Safe Use of Outdoor Fire Pits & Fireplaces

Safe Use of Outdoor Fire Pits & Fireplaces

Outdoor Fire Pits & Fireplaces: Practical Safety Guidelines for Arizona Homeowners

Outdoor fire pits and fireplaces—whether built-in or portable—add warmth, atmosphere, and a gathering spot to your backyard. In Arizona’s dry climate, even a few drifting embers can ignite mulch or nearby plants and raise wildfire risk. This guide lays out clear, practical steps so homeowners can enjoy their fire features while minimizing liability and property damage. You’ll find placement rules, approved fuel choices, supervision tips for children and pets, local permitting notes, and simple extinguishing and maintenance routines tailored for residential settings. We also cover Arizona-specific permit and burn-ban issues, a city reference table, and how professional design and installation fold safety into luxury outdoor living. Use the checklists and tables here to make safe, repeatable decisions.

Key Outdoor Fire Pit Safety Guidelines Every Homeowner Should Know

Fire pits and fireplaces are intentional sources of heat and light that need careful siting, construction, and operation to prevent ember spread, structural ignition, and injury. The main risks come from ember transport and radiant heat reaching combustible materials. Following basic guidelines reduces wildfire risk, limits insurance exposure, and extends the life of the feature. Start by confirming clearances from structures and vegetation, installing a non-combustible base and perimeter, supervising all burns, and keeping tested extinguishing tools nearby. Local codes and seasonal restrictions can change what fuels are allowed and whether a permanent installation needs a permit, so include a permit check in your planning. The checklist below summarizes these core practices and connects to the fuel, maintenance, and supervision recommendations that follow.

Understanding wildfire prevention—especially where homes meet wildlands—reinforces why local safety rules matter.

WUI Fire Hazard Guidelines: Planning & Defensible Space

Wildland-Urban Interface (WUI) fires are a growing global concern due to climate change and expanding development. Jurisdictions publish standards and codes for planning, prevention, and protection against wildfires. This review summarizes WUI hazard guidance, including defining risk zones, defensible-space practices, and material and protection requirements for the built environment.

Guidance on design and construction of the built environment against wildland urban interface fire hazard: a review, P Intini, 2020

This numbered checklist highlights the most actionable safety rules you can apply right away.

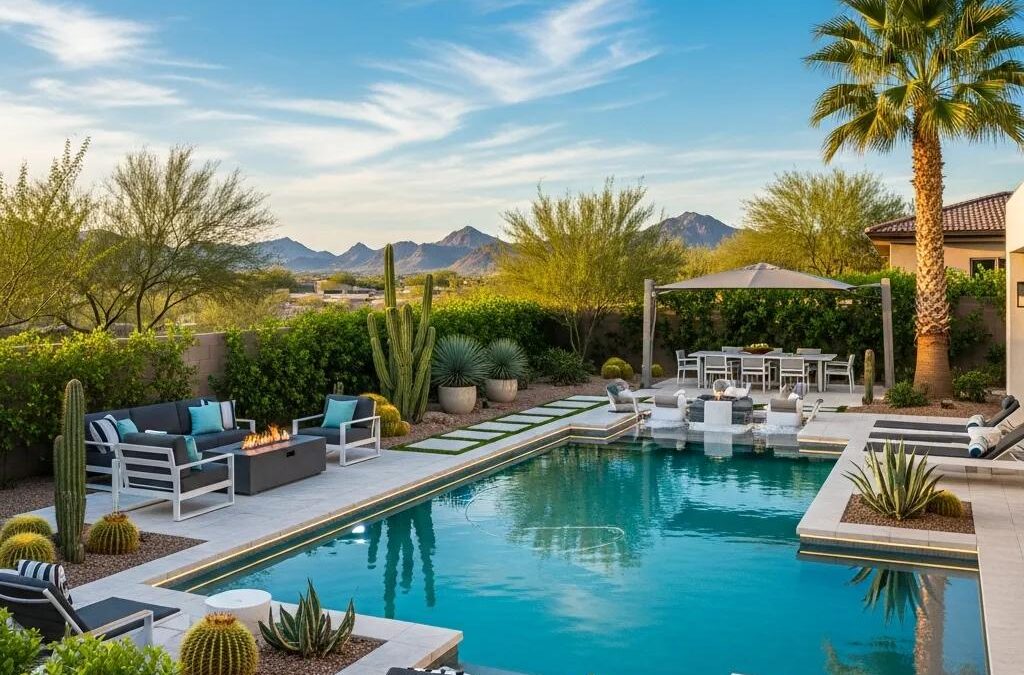
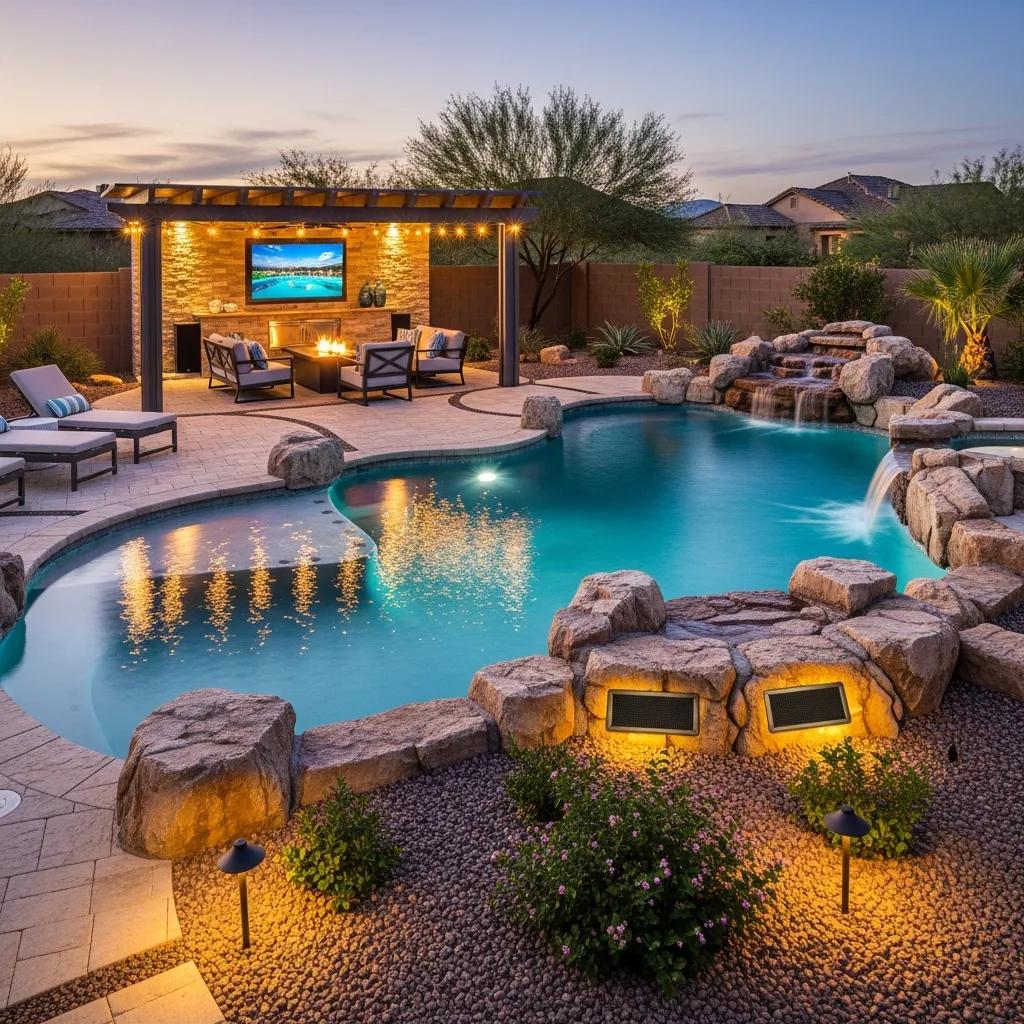
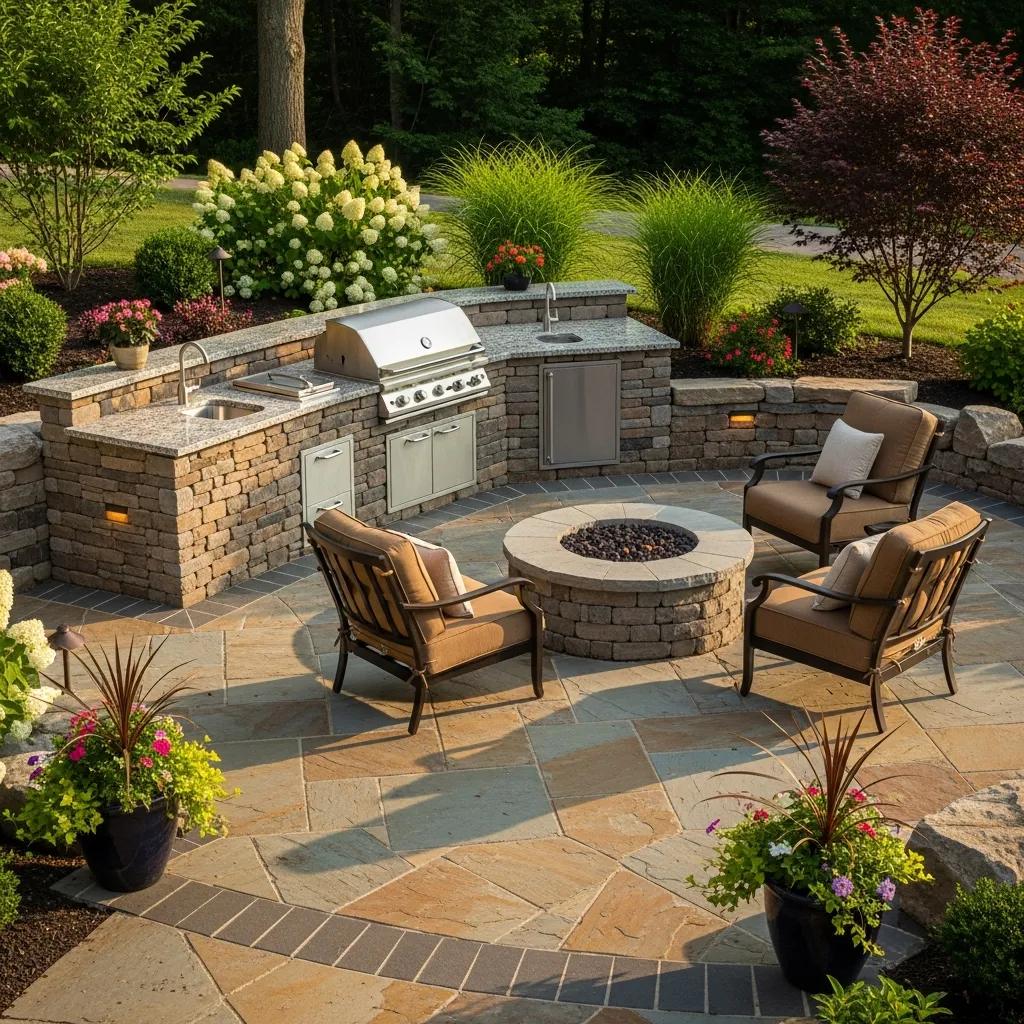
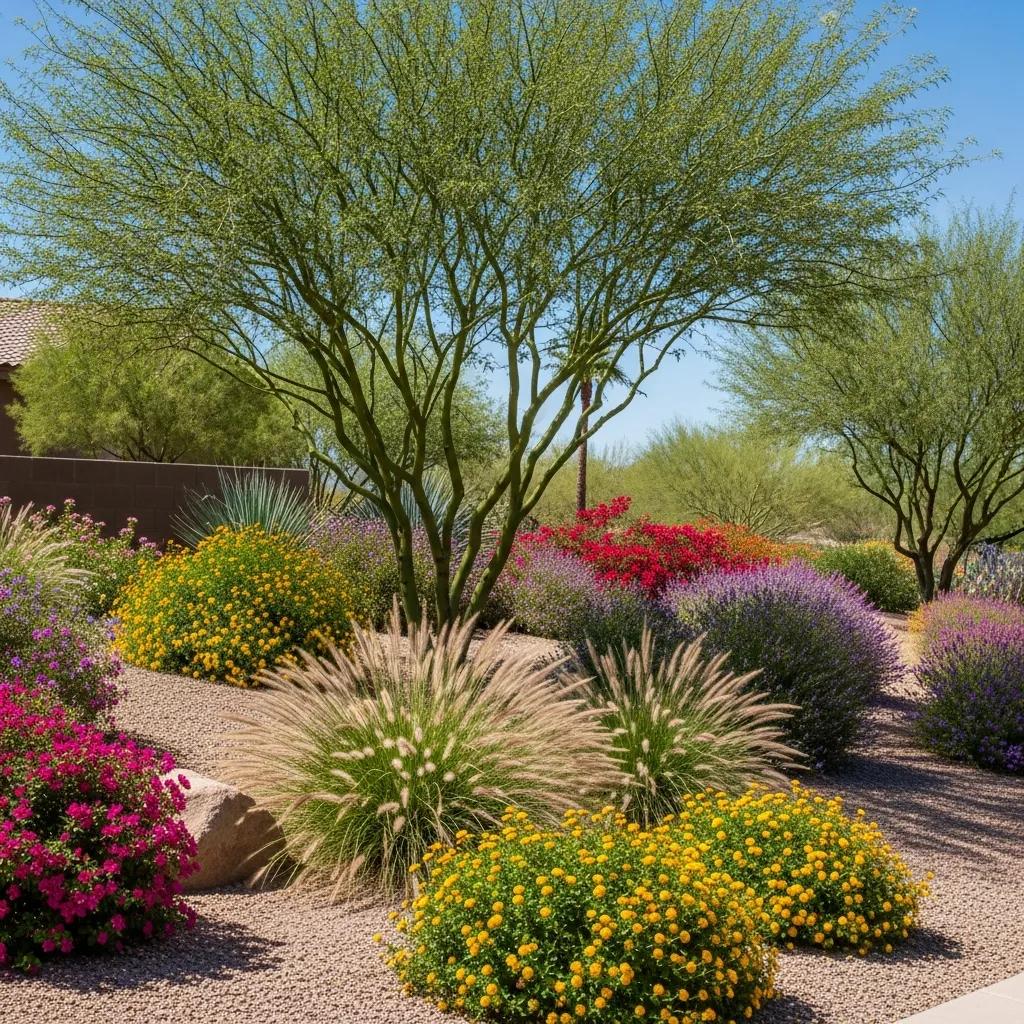
  1. Maintain minimum clearances: Keep flames at least 10 feet from structures and about 25 feet from large trees or combustible hedges whenever practical.
  2. Use non-combustible bases: Place fire pits on concrete, pavers, stone, or compacted gravel instead of wood or combustible decking.
  3. Control embers and sparks: Fit spark screens or arrestors and clear the surrounding area of loose mulch and dry leaves.
  4. Supervise at all times: Never leave an active fire unattended—assign a responsible adult to monitor conditions and wind changes.
  5. Keep extinguishing tools ready: Have a Class ABC extinguisher, a metal shovel, and a bucket of water or sand within reach.
  6. Avoid accelerants and banned materials: Never use gasoline, lighter fluid, treated wood, plastics, or household trash as fuel.

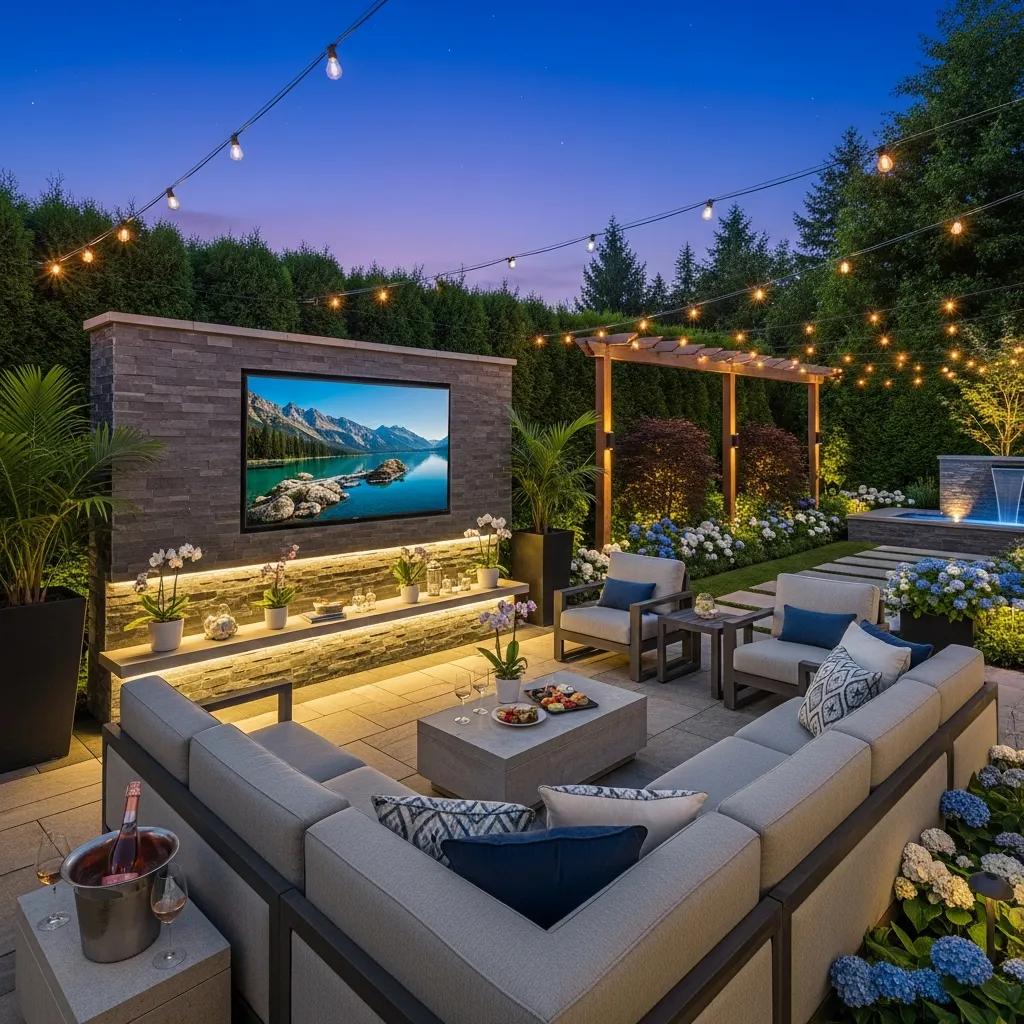
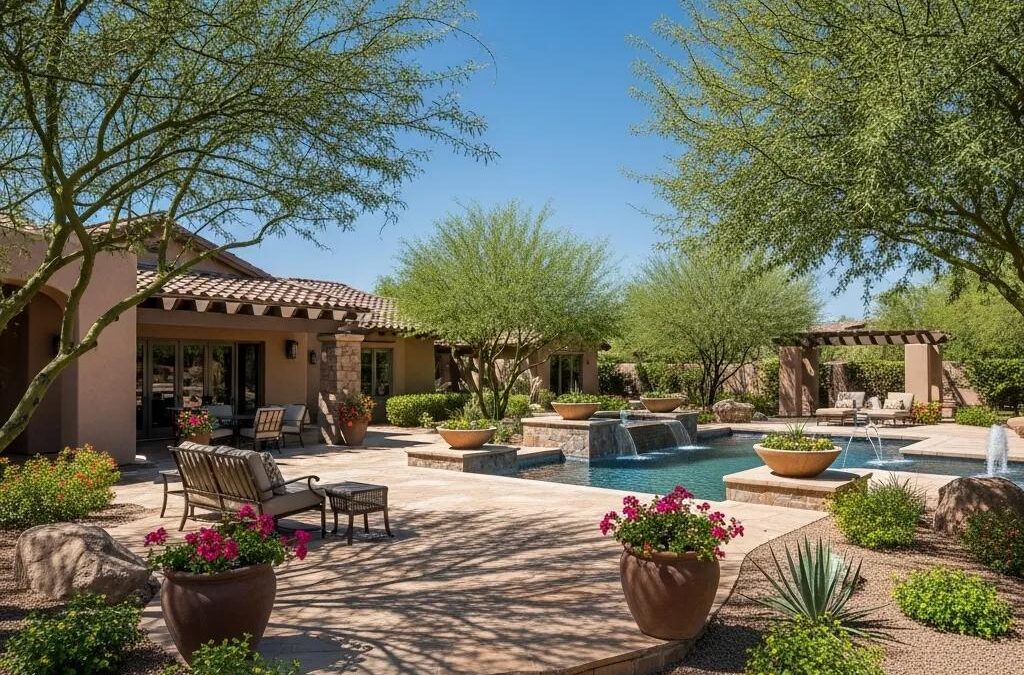
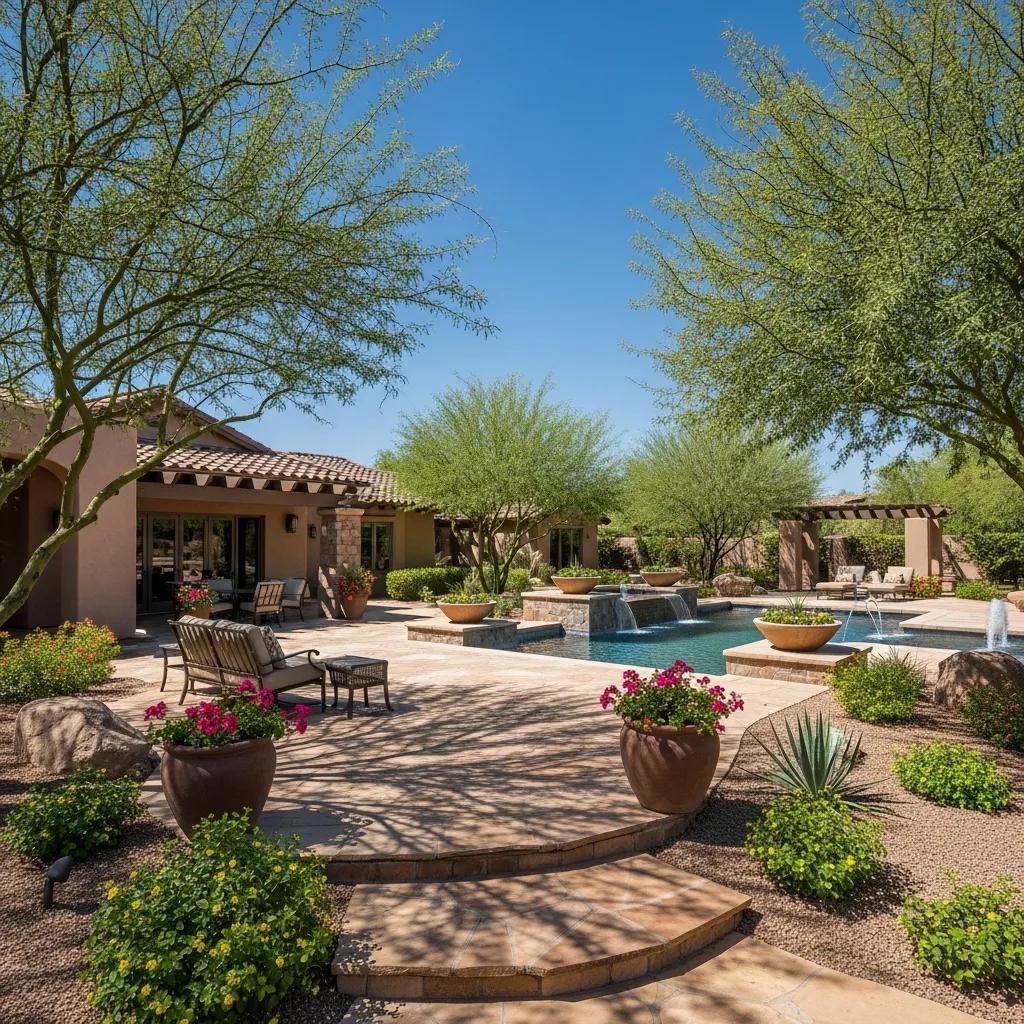
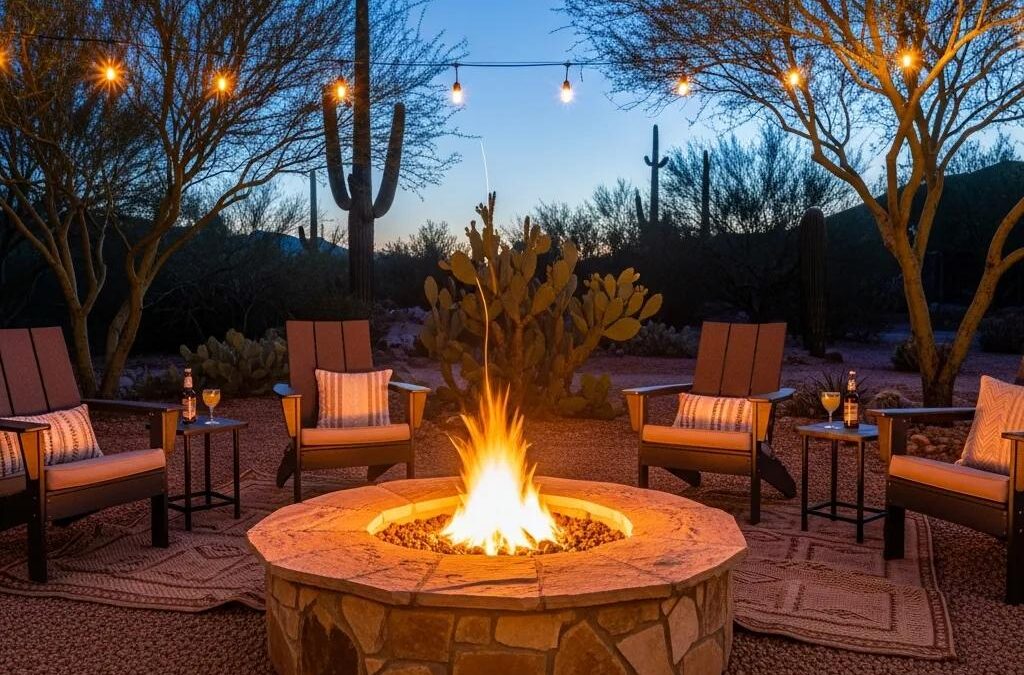
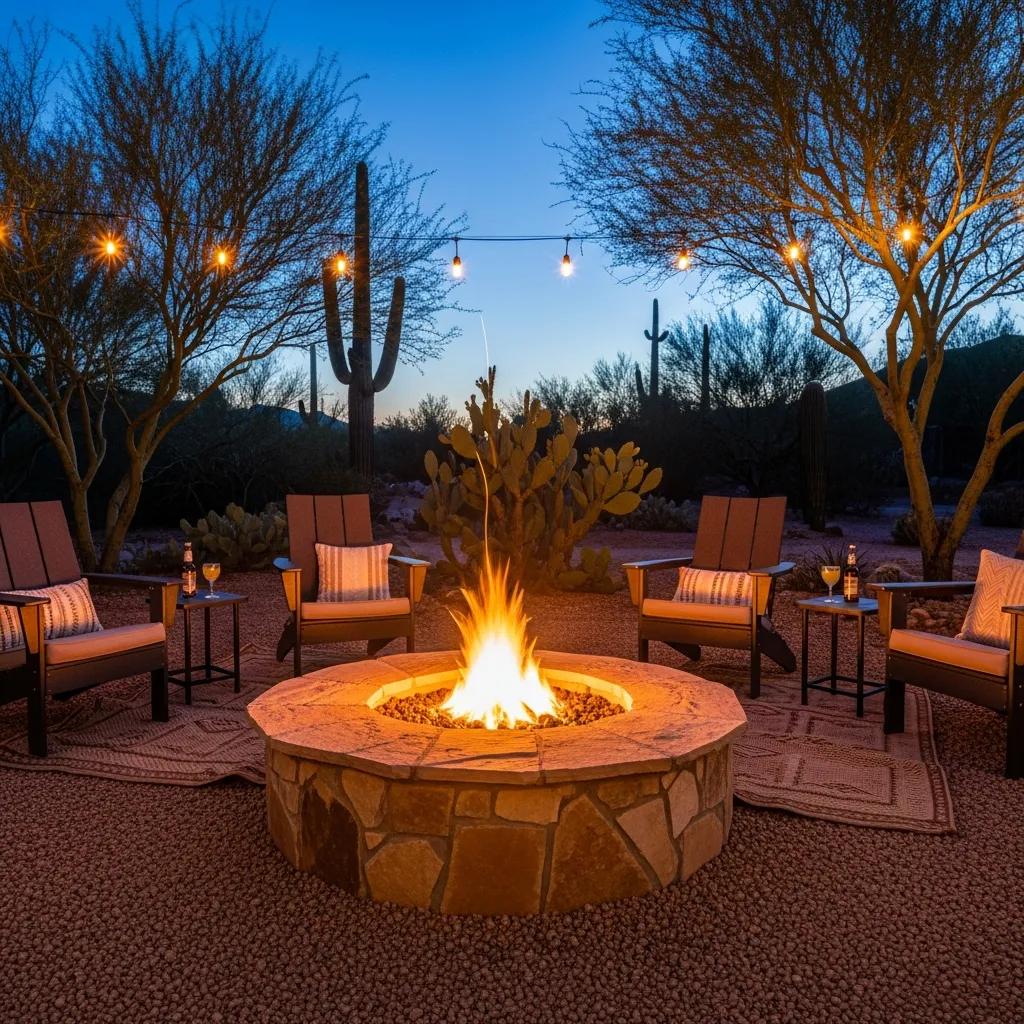
Choosing a Safe Location for Your Fire Pit or Fireplace

Pick a location by measuring horizontal and vertical clearances, checking prevailing winds, and planning sightlines to pools, patios, and walkways. Start with at least 10 feet horizontally from house eaves, overhangs, and utility lines, and increase distance when dense shrubs or combustible landscaping are present. Confirm there are no tree limbs, pergolas, or rooflines overhead—embers can travel up and ignite higher combustibles. Note wind patterns throughout the day and orient seating so smoke drifts away from the home and neighbors. A well-sited pit keeps sightlines clear for supervision, preserves safe walkways, and uses non-slip approaches to reduce trip hazards and ember contact.

Non-Combustible Materials for Safe Fire Pit Bases

Non-combustible bases limit heat transfer and stop direct contact between embers and combustible surfaces. Good options include poured concrete pads, interlocking pavers on compacted aggregate, natural stone slabs, or a compacted gravel bed with a steel burn ring. Don’t place pits directly on wooden decks unless an engineered heat shield and certified installation are used—extra clearance, a protective barrier, and frequent inspection are still required. For built-in pits, a metal burn ring or insert inside the masonry protects mortar and stone from cyclic heating and spalling. The right base also simplifies maintenance and cuts the chance of settling or cracks that create ember traps later on.

How Arizona Regulations and Permits Affect Outdoor Fire Features

Permit rules in Arizona vary by city and county and can determine whether a permanent masonry pit, a gas fireplace, or a portable wood unit needs a permit or inspection. Differences come from local building codes and wildfire risk assessments. Seasonal burn bans and air-quality advisories also affect what fuels and recreational fire times are allowed, so always check local rules before installing or using a fire feature. Common permit triggers include permanent gas hookups, built-in masonry work, and any changes to structural or utility systems; portable units used occasionally generally face fewer permit requirements but still must follow burn-ban rules. Preparing permit paperwork, following inspection checklists, and scheduling work around regulatory windows reduces delays and rework. If this feels complex, a professional can streamline approvals for homeowners aiming for compliant, high-end outdoor living.

Island Pools and Landscaping AZ designs luxury outdoor living spaces and routinely handles permit coordination as part of our installation process. We work with local authorities so safety and aesthetics align with construction milestones and inspection timelines.

Which Arizona Cities Typically Require Permits?

Permit requirements depend on whether the feature is permanent, tied into utilities, or part of a larger hardscape. Generally, permanent masonry fireplaces, built-in gas burners, and work involving gas-line extensions or structural changes will require a permit and often an inspection. Portable, freestanding units that aren’t attached to fuel lines may not need construction permits but still must meet setback and burn-ban rules. Processing times, required documents (plans, site sketches, gas specs), and inspection checklists vary by jurisdiction, so contact your city or county early to avoid surprises. When unsure, plan as if the feature is permanent—this conservative approach favors safety and compliance.

Remember: burn bans and seasonal restrictions can override typical permit allowances—check both permit rules and current burn status.

City/CountyPermit Required?Notes
Phoenix (Maricopa area jurisdictions vary)Often yes for permanent installationsPermanent fireplaces and gas-line hookups generally trigger permits and inspections
Tucson / Pima CountyYes for built-in or gas-connected featuresPortable units may be allowed with setbacks; confirm seasonal bans
Flagstaff / Coconino CountyFrequently yes, with wildfire-focused restrictionsHigher elevations and forested areas have stricter burn rules and shorter seasons

This matrix shows how requirements vary—verify both permit thresholds and seasonal restrictions locally.

Permit rules work alongside burn bans and wildfire alerts, which are the next operational step owners should check.

Current Burn Bans and Restrictions in Arizona

Burn bans are determined by local fire districts, county air-quality advisories, and statewide drought and wildfire alerts, and they directly affect whether wood-burning features are allowed. During high-risk periods, authorities may prohibit open burning and recreational fires, restrict charcoal and wood use, or permit only certified gas appliances with spark control. Always check alerts from your local fire department, county office, or the state forestry service before lighting a fire to avoid fines and reduce wildfire risk. If a ban is active, delay wood-burning activities or switch to approved gas or propane options that meet local rules. Carry a simple decision checklist—permit status, burn-ban status, and available extinguishing equipment—to keep outdoor living legal and safe.

Best Practices for Fuel Selection and Ember Prevention

Fuel choice has a big impact on ember production, smoke, and chemical hazards. Use well-seasoned hardwoods and manufactured logs rated for outdoor use when burning wood. Gas and propane systems produce fewer embers and are easier to control. Store fuels in a cool, dry spot away from structures and check moisture content before burning to avoid excessive smoke and hard-to-control fires. Combine good fuel choices with physical ember controls—spark screens, burn rings, and perimeter gravel—to reduce ember travel. The table below compares common fuel options to help you choose safely.

Below is a quick comparison of common fuel options and precautions.

Fuel TypeSafe to Burn?Notes/Precautions
Seasoned hardwood (oak, mesquite)YesLow moisture (<20%), high heat, fewer sparks; store dry and split
Manufactured fire logsYes, if rated for outdoor useConsistent burn and reduced sparks; follow manufacturer guidelines
Propane/gasYes (with certified installation)Clean burn, minimal embers; requires proper gas-line installation and shutoff

After choosing fuel, follow operational do’s and don’ts to further reduce risk and neighbor impacts.

Safe Wood and Fuel Choices for Outdoor Pits

Seasoned hardwoods like oak or native mesquite are preferred because lower moisture yields hotter, cleaner combustion with fewer sparks and less smoke. Manufactured logs made for outdoor use burn predictably and produce fewer embers when used per instructions. Professionally installed gas or propane systems produce minimal airborne embers and are often allowed during higher-risk periods when wood burning is restricted. Confirm wood is well-seasoned (ideally below 20% moisture) before burning, and store it off the ground under breathable cover to prevent mold. Fuel choice affects safety and neighbor comfort—consider smoke profile and scent, especially near pools and seating areas.

Materials You Should Never Burn

Do not burn treated, painted, or pressure-treated lumber, plywood, or particleboard—these release toxic fumes and can produce hot, unpredictable embers. Avoid plastics, glossy or coated paper, cardboard, yard trash, and household waste; they emit toxic smoke and can create molten droplets that start secondary fires. Never use accelerants like gasoline, lighter fluid, or alcohol to start or speed a fire—these cause explosive flare-ups and unpredictable heat. For yard waste, use municipal green-waste pickup, chipping, or composting instead of burning to protect air quality and reduce fire risk. Substitute seasoned wood or approved manufactured logs for safer burning.

Supervision and Safety Around Fire Pits for Children and Pets

Active supervision and physical separation are the best protections against burns and accidental contact. Create a clear safety zone with defined boundaries and seating placement, and enforce supervision whenever a fire is lit. Teach household members and guests simple rules—no running near the fire, keep flammable clothing away, and assign an adult to watch the burn. For pets, use training, leashes, or temporary gates to keep curious animals at a safe distance; pet fur and synthetic bedding can ignite quickly if embers land. Temporary barriers and clear signage help during gatherings or when alcohol is present.

Recommended Safe Zones and Distances

Set measurable safe distances by activity: seated adults should stay at least three feet from the pit edge; for active children and pets increase that to six to ten feet depending on fire size and wind. Arrange seating in a circular pattern with clear paths and keep play areas well outside the active zone. Consider a raised curb or low decorative wall as a visual and physical barrier. In windy conditions, increase clearances or switch to gas appliances to reduce ember travel. Temporary baby gates, outdoor safety screens, or marked rope lines add protection during events and can be removed afterward. These simple spatial rules give supervisors predictable boundaries to enforce.

Essential Safety Equipment for Outdoor Fire Pits

Keep a Class ABC fire extinguisher sized for residential outdoor use (a 2A:10B:C or larger is recommended), a metal shovel for spreading coals, a metal ash container with a lid for cooled ash, and a spark screen or arrestor sized to the pit opening. Store extinguishers and ash tools in a clearly marked, weather-protected spot within arm’s reach of the fire area and make sure household members know how to use them. A fire blanket helps with small clothing ignitions, and a bucket of sand or water can quickly suppress small embers. Inspect equipment regularly—check extinguisher pressure, screen mesh, and tool condition—so the right tools are ready if needed.

Proper Steps for Extinguishing and Maintenance

Thorough extinguishing removes residual heat that can smolder and spread, while regular maintenance prevents degradation that leads to unsafe conditions. For wood fires, let flames die down to embers, spread them to speed cooling, and slowly apply water or sand while stirring until no hot spots remain. Verify by cautiously checking for heat from a safe distance. For gas systems, shut off the fuel at the source and follow manufacturer cool-down guidance, and schedule periodic professional gas-line inspections. Regular tasks—ash removal, screen cleaning, mortar checks, and gas-valve inspections—prevent buildup and hidden hazards. The maintenance table below gives a simple schedule and tools so homeowners can adopt a repeatable routine.

Use this maintenance schedule and tool list to keep your fire feature safe and long-lasting.

TaskFrequencyTools/Method
Ash removalAfter each significant useMetal shovel and metal ash container with lid; ensure ash is cold before storage
Spark-screen and grate inspectionMonthly during seasonWire brush, heat-resistant gloves; replace screens with damaged mesh
Gas-line inspection and testingAnnually or after serviceLicensed technician, gas leak detector, pressure test per code

Following this schedule helps prevent hazards and extends the life of your fire feature.

How to Safely Extinguish Your Fire Pit or Fireplace

Follow a controlled sequence: reduce the flames, separate embers, cool, and verify. For wood fires, let flames fade until mostly coals remain, then spread the coals with a metal shovel to expose hotspots. Gradually add water or sand while stirring—avoid dumping large volumes that scatter ash and create steam. Continue until there’s no steam, sizzling, or glowing embers, then check for residual heat from a safe distance. Once cool, move ashes to a metal container with a lid for disposal or cold storage. For gas systems, turn off the control valve and main supply, follow manufacturer cool-down steps, and inspect fittings for leaks before the next use.

Routine Maintenance to Prevent Hazards and Damage

Routine maintenance stops structural decline and hidden risks—address ash buildup, mortar deterioration, creosote (in enclosed fireplaces), and gas-line integrity. Remove cooled ash after use to prevent moisture retention and corrosion. During heavy use, inspect screens, grates, and burn rings monthly for warping or cracks and replace worn parts. Annually, schedule a full inspection: check mortar joints, clean chimneys or flues where applicable, and have a licensed technician test gas lines. Repair structural damage—large cracks, spalling stone, or persistent odors—promptly to prevent worsening issues. Regular upkeep reduces fire risk and keeps the finish and value of your luxury outdoor space intact.

How Island Pools and Landscaping AZ Builds Safety into Luxury Fire Features

At Island Pools and Landscaping AZ we design and build luxury outdoor living spaces with safety integrated from concept to handover. Our process includes clearance modeling, specifying non-combustible surrounds, and coordinating with permitting authorities so installations meet both design and code requirements. In design we model radial clearances, sightlines to pools and structures, and wind patterns to optimize placement. We choose heat-resistant finishes, plan for drainage, and add ember-control details that protect aesthetics without compromising safety. Installation covers professional gas-line testing, proper foundations and anchoring, and a post-installation walkthrough that reviews operation, maintenance, and safety equipment placement. This methodical approach reduces liability, improves longevity, and delivers the high-quality finishes our clients expect.

Design Elements That Improve Safety in Custom Fire Features

Design choices that lower risk include raised hearths to limit direct contact, non-combustible surrounds like stone or concrete, integrated gravel or paver setbacks, and built-in ember-control screens or wind breaks. Designers balance comfort and clearance with raised planters or low walls to create visual separation while maintaining required distances. Specify finishes with high thermal tolerance and minimal spalling, and use a metal burn ring or stainless steel insert for wood-burning installations. Include drainage and clean-out access to prevent water retention and freeze/thaw damage in colder microclimates, and design for easy replacement of wear items like grates or screens. These details preserve a luxury look while keeping safety straightforward and maintainable.

Why Professional Installation Matters for Safety

Professional installation enforces quality checks that DIY projects can miss: correct foundation compaction, proper burner and gas-line sizing, certified gas connections with leak testing, secure anchoring, and documented inspections with local officials. Licensed installers confirm combustion air and venting for enclosed fireplaces and run post-installation combustion and leak tests for gas systems. A professional handover includes homeowner training on operation, extinguishing, and basic maintenance, plus a checklist of items that need scheduled professional service. Working with licensed professionals also streamlines permitting because they know local documentation and inspection requirements, reducing rework and ensuring code compliance. That discipline protects homeowners and preserves the value and beauty of luxury outdoor installations.

To request a consultation or see visual examples, ask us for a design review that covers clearance modeling, material samples, and photo callouts of completed projects showing how safety and luxury come together. Island Pools and Landscaping AZ focuses on detail, clear communication, and top-quality materials and installation—contact us to discuss site-specific safety and design options.

Frequently Asked Questions

What should I do if I notice a burn ban in my area?

If a burn ban is in effect, follow local rules to avoid fines and reduce wildfire risk. During bans, recreational fires may be prohibited. Consider using gas or propane appliances that comply with local standards if permitted. Always confirm current restrictions with your local fire department or county office before using any outdoor fire feature.

How can I safely store firewood for my outdoor fire pit?

Store firewood in a cool, dry place away from structures and combustible materials. Stack wood off the ground on a rack to promote airflow and speed drying. Use a breathable cover over the top of the pile to protect from rain but allow moisture to escape. Aim for well-seasoned wood—ideally below 20% moisture—to reduce smoke and sparks.

What are the signs that my outdoor fire pit needs maintenance?

Look for visible cracks or spalling in masonry, rusted metal components, or heavy ash and debris buildup that blocks airflow. Excessive smoke or difficulty keeping a flame can indicate a blockage or structural issue. Inspect spark screens for damage and have gas lines checked if you suspect leaks. Address issues promptly to prevent hazards and costly repairs.

How can I create a safe environment for children around fire pits?

Set a clear safety zone of at least six to ten feet for active children, use physical barriers like baby gates or low walls, and keep seating arrangements away from the fire edge. Teach children fire safety rules—no running near the fire—and always assign an adult to supervise when the fire is lit. Non-combustible seating and visible boundaries help reduce accidental access.

What should I do if my fire pit produces excessive smoke?

Check your fuel first: wet or unseasoned wood produces more smoke. Use well-seasoned hardwood or approved manufactured logs. Inspect the pit for restricted airflow or chimney blockages and rearrange the wood to improve ventilation. If the issue continues, call a professional for a thorough inspection and maintenance.

Are there specific materials I should avoid when building a fire pit?

Avoid combustible materials such as wood or treated lumber and materials that emit toxic fumes when heated—plastics, painted wood, or particleboard. Use non-combustible materials like stone, brick, or concrete for longevity and safety. Proper material choice is essential for a durable, safe fire feature.

How often should I inspect my outdoor fire pit for safety?

Inspect your fire pit at least monthly during the burning season and after each heavy use. Check for structural cracks, damaged spark screens, and secure, leak-free gas lines. Clean out ash and debris to maintain airflow. A consistent inspection routine helps you catch problems early and keeps operation safe.

Conclusion

Following these safety guidelines helps reduce wildfire risk while letting you enjoy your outdoor space. By matching local rules with good practices—proper siting, sensible fuel choice, regular maintenance, and responsible supervision—you create a safer backyard for family and friends. Ready to combine safety and luxury? Contact a professional to plan and install a fire feature that fits your site and meets local codes. Explore our services to bring safe, beautiful outdoor living to your home.

Partnering with Industry Leaders: Paramount & Pentair

Partnering with Industry Leaders: Paramount & Pentair

Arizona Luxury Pool Remodels with Paramount & Pentair — Trusted Equipment, Lasting Results

Luxury pool remodels that specify industry leaders like Paramount and Pentair pair proven equipment engineering with design-forward systems to create low‑maintenance, energy‑smart backyards for discerning homeowners. Below we show how manufacturer-grade components—better circulation, integrated cleaning, advanced automation, and improved sanitation—change a pool’s lifecycle and everyday experience in Arizona. Many owners wrestle with surprise maintenance costs, inconsistent water quality, and the tension between dramatic design and reliable operation; aligning with trusted suppliers solves those pain points by bringing durable mechanics and intelligent controls into the plan from day one. Scroll on for a clear comparison of Paramount and Pentair offerings (think Paramount PCC2000 and Pentair IntelliFlo3), real project outcomes, and practical next steps for a remodel that balances performance with beautiful design.

Why Partner with Paramount and Pentair for Luxury Pool Remodeling?

Paramount and Pentair build equipment that emphasizes mechanical reliability, modular innovation, and long-term parts availability—so you spend less time fixing gear and more time enjoying the backyard. Specifying manufacturer‑grade components improves circulation, filtration, and automation capabilities, which lowers lifetime operating costs and reduces routine maintenance for homeowners. Factory warranties and established supply chains also protect remodel investments by making parts and technical support easier to get than with commodity equipment, helping preserve resale value and peace of mind. Compared with generic gear, these suppliers offer deeper integration paths for lighting, sanitization, and in‑floor cleaning that designers can confidently include in complex remodels.

For high‑end projects, working with Paramount and Pentair delivers clear homeowner outcomes and greater design freedom. With trusted equipment specified early, designers can add water features, negative edges, and custom geometries without sacrificing hydraulic performance. Coordinated control protocols mean automation and features operate as a cohesive system, cutting the need for on‑site workarounds. Knowing these advantages helps homeowners prioritize equipment choices during the design phase.

  • Key benefits of partnering with Paramount and Pentair:

    Reliability: Heavy‑duty components cut failures and downtime.
    Innovation: Advanced cleaning and automation add convenience.
    Efficiency: Variable‑speed pumps and smart controls lower energy use.
    Support: Easier parts sourcing and manufacturer guidance protect your investment.

Put simply: the result is a backyard that runs predictably and looks exceptional with less hands‑on care from the owner. Next, we explain how Paramount’s in‑floor cleaning systems do much of that work by using engineered circulation patterns.

Island Pool and Landscaping maintains dealer relationships with both Paramount and Pentair so those manufacturer advantages translate into confident product selection, warranty coordination, and retrofit or new‑build installation options. Our role is to match equipment to your project goals while preserving the technical benefits and inviting you to a consult to explore upgrades.

What advantages do Paramount and Pentair bring to high-end pool projects?

Paramount and Pentair supply engineered subsystems—cleaning, circulation, automation, and sanitation—designed to work together reliably in complex pool geometries. Their components are manufactured to tighter tolerances and include sealed motors, modular electronics, and standardized control interfaces that simplify integration with lighting and water features. For homeowners, that means fewer service calls, longer intervals between maintenance, and steady performance across Arizona’s seasons. Brand documentation and dealer networks also make sourcing parts and scheduling professional service simpler when you need it.

Those supplier strengths also unlock design options: engineers and landscape architects can specify in‑floor jets, variable‑speed pumps, and automated controls without resorting to risky custom fixes. That predictability supports elevated features—vanishing edges, raised spas, integrated water kitchens—while keeping mechanical systems accessible for routine service. With these benefits in view, the next subsection shows how partnerships turn into measurable performance and reliability gains.

How do these partnerships enhance pool performance and reliability?

Working with established manufacturers improves performance by combining component engineering (pumps, valves, jets) with system‑level controls that optimize flow and sanitation automatically. Variable‑speed pumps and coordinated automation reduce runtime and stabilize turnover rates, which improves clarity and lessens chemical volatility—critical for maintaining luxury finishes. Quality control at the factory also reduces premature seal failures, motor burnouts, and electronic faults you might see with lower‑cost equipment. For homeowners, better engineering means fewer surprises, steadier water quality, and a more worry‑free ownership experience.

Integrated systems further reduce human‑error maintenance: automation handles schedules, exception alerts, and interlocks for heaters, cleaners, and sanitizers. That prevents risky sequences—like running a heater without proper circulation—that can stress equipment and surfaces. Those protections preserve pool assets and minimize lifetime service interruptions. With that foundation explained, the next major section looks at how Paramount’s in‑floor cleaning systems cut down on manual maintenance.

How Do Paramount In-Floor Cleaning Systems Revolutionize Pool Maintenance?

Paramount’s in‑floor cleaning systems sweep pool surfaces with timed jet sequences that move debris toward collection points, reducing skimming and vacuuming while improving chemical distribution. A network of in‑floor outlets and timed valves generates currents that dislodge fine and coarse debris across shallow shelves and deep ends, sending waste to returns or drains. The net effect: cleaner surfaces, more even sanitizer distribution, and less reliance on handheld or robotic cleaners—especially important when preserving luxury finishes and clear sightlines. In‑floor hardware also fits neatly into complex geometries and water features, keeping the look clean while the system works out of sight.

Before comparing models, here’s a concise table comparing Paramount’s main in‑floor systems to help you choose the right solution for a remodel or retrofit.

ModelCleaning MethodRetrofit CompatibilityIdeal Project Type
PCC2000Timed sweep with synchronized jetsBest for new construction; limited retrofit optionsLarge custom pools with complex geometry
PV3High‑coverage directional jetsRetrofit‑friendly for many existing shellsRenovations seeking broader floor coverage
VanishLow‑profile, vanishing‑jet integrationWorks well in aesthetic‑focused remodelsPools prioritizing discreet hardware
VantageZoned control with targeted jetsDesigned for modular installs and staged upgradesHigh‑end remodels needing precise debris control

This comparison shows how each system balances coverage, retrofit potential, and aesthetics so you can pick what fits your build type, shell shape, and maintenance goals.

Paramount systems cut long‑term maintenance by consistently moving debris and improving circulation, which helps stabilize chemical levels. That translates into fewer service visits and less reliance on labor‑intensive cleaning routines. The sections below break down key model features and describe how in‑floor cleaning delivers measurable time and operational savings.

What are the key features of Paramount's PCC2000, PV3, Vanish, and Vantage systems?

Each Paramount model has a clear focus: coverage, retrofit ease, invisibility, or zoned control. The PCC2000 is built for wide‑sweep coverage in large custom shells and handles heavier debris patterns. PV3 strikes a balance—strong performance with retrofit flexibility—so it’s popular for upgrades that avoid full demolition. Vanish emphasizes aesthetics with outlets that blend into the finish, ideal where visible hardware is a concern. Vantage provides zoned control and modular expansion for precise schedules and easier future upgrades.

Installation timing matters: PCC2000 and Vantage are best specified early so plumbing and hydraulics are optimized, while PV3 and Vanish can often be added during targeted renovations. Control needs vary too—some systems require timed valves or dedicated controllers—so coordinate with your automation platform during engineering. These distinctions help homeowners and designers match mechanical performance to visual and budget priorities.

How do in-floor cleaning systems reduce maintenance and improve water quality?

In‑floor systems use directed jet patterns and scheduled cycles to move debris from floors and shallow shelves toward drains or filtration intakes, cutting the need for manual skimming and robotic cleanings. That steady, gentle circulation also evens out chemical distribution, reducing sanitizer spikes and stabilizing pH—both of which help protect finishes and clarity. Homeowners typically see fewer weekly hands‑on cleaning hours and a simpler chemical routine. In Arizona, where dust and windblown debris are common, in‑floor systems noticeably reduce visible build‑up and can shorten total filtration runtime.

Beyond time savings, better circulation eases wear on skimmers and portable vacuums, extending accessory life and lowering replacement frequency. The overall result is a cleaner‑looking pool with less operational hassle—an attractive outcome when a remodel aims for both beauty and convenience. With cleaning explained, the next section covers Pentair’s smart technologies that automate and optimize those mechanical systems.

What Smart Pool Technologies Does Pentair Offer for Modern Luxury Pools?

Pentair provides a full ecosystem—automation hubs, variable‑speed pumps, sanitization modules, and ozone options—that simplifies control, cuts energy use, and reduces maintenance for modern luxury pools. These systems let you schedule remotely, create scene presets for lighting and features, and optimize hydraulics to lower runtime and stabilize chemistry. Pairing Pentair automation with Paramount cleaning and properly sized hydraulics creates an interoperable system that improves user experience and lowers lifecycle costs. The table below clarifies control features, energy potential, sanitation results, and homeowner value.

SystemPrimary Control/FeatureTypical Benefit
IntelliCenterCentral automation hub with app controlRemote scheduling, scene presets, and system monitoring
IntelliFlo3Variable‑speed pump with optimized hydraulicsMeaningful energy savings and quieter operation
IntelliChlorSalt chlorine generator controlConsistent chlorine production with less chemical handling
Clear O3Ozone sanitization moduleImproved oxidation and reduced chemical demand

Use this table to weigh ease of control against energy and sanitation priorities—each component reduces operational burden while supporting luxury features.

Pentair’s automation focuses on a homeowner‑friendly interface and reliable scheduling that handles cleaning cycles, heater operation, and feature sequencing without constant attention. Scene controls let you create “party,” “relax,” or “maintenance” modes that run pumps, lights, and water features together. That automation lessens daily decision fatigue and protects system longevity by enforcing correct operating sequences. The sections below dig into IntelliCenter and IntelliFlo3 in more detail.

How does Pentair IntelliCenter enable remote pool automation and control?

IntelliCenter is a centralized control hub that ties pumps, heaters, cleaners, sanitizers, and lighting into one scheduleable, remotely accessible interface. Owners can set daily cleaning windows, temperature hold points, and entertainment scenes from an app—reducing on‑site tinkering. Remote status visibility helps service techs diagnose issues faster, cutting time‑to‑service and downtime. Where desired, IntelliCenter can integrate with whole‑home automation when electrical and control pathways are planned during remodeling.

IntelliCenter’s scheduling and scene features simplify owner interaction and protect hydraulic and electrical efficiency by preventing conflicting equipment calls. That consistency matters for luxury remodels with multiple features and pool/spa interactions that must coordinate precisely. Next, we quantify energy savings tied to variable‑speed pumping.

What energy-saving benefits do Pentair IntelliFlo3 pumps provide?

IntelliFlo3 variable‑speed pumps reduce energy use by matching motor speed to hydraulic demand instead of running at one constant speed. Lower speeds during filtration and idle circulation translate into measurable operating‑cost reductions and much quieter running—improving backyard comfort. Typical savings versus single‑speed pumps vary with runtime and local rates, but upgrades usually yield significant percent reductions. The pump’s flexibility also lets owners schedule heavy runs for off‑peak hours. Reduced mechanical stress from variable operation extends motor life and lowers replacement frequency over the pump’s lifecycle.

When paired with smart scheduling, variable‑speed pumps avoid wasted runtime and let designers dial flow for delicate water features without oversizing equipment. That precision improves energy performance and supports refined hydrodynamic effects that matter to the look and sound of luxury pools. After Pentair, the next section explains how Island Pool and Landscaping integrates these products into custom remodels.

How Does Island Pool and Landscaping Integrate Paramount and Pentair Products into Custom Pool Designs?

We integrate manufacturer equipment into luxury remodels through a coordinated process that aligns homeowner goals with product capabilities, engineering needs, and construction sequencing. Our services include consultation, custom pool design, outdoor living design and build, landscaping, artificial turf installation, project management, and a final walkthrough to confirm satisfaction—steps that make sure equipment choices meet lifestyle and maintenance expectations. During planning we treat equipment as an engineering constraint that guides plumbing layout, control locations, and service access so aesthetics and long‑term operability are preserved. Project management coordinates warranties and commissioning so you receive a documented handoff and clear maintenance plan.

Our integration process emphasizes communication between design, mechanical, and landscape teams so lighting, water features, and outdoor kitchens complement Paramount and Pentair systems without creating service conflicts. That coordination keeps automation, pumps, and cleaners accessible yet discreet, maintaining the luxury look while allowing routine servicing. Homeowners benefit from a single‑source approach that manages product selection, warranty coordination, and commissioning as part of the remodel.

What is the process for incorporating industry-leading equipment into luxury remodels?

We start with an on‑site consultation and discovery to document goals, existing equipment, and constraints. From there we produce a conceptual design that maps aesthetic intent to hydraulic and electrical requirements. Next we select equipment—Paramount in‑floor systems or Pentair pumps and automation—to match the design, then create engineering and construction documents that place plumbing, conduits, and service access correctly. Installation and commissioning finish the project with functional testing, system programming, and a homeowner walkthrough that explains automation, maintenance expectations, and warranty coordination. This staged approach minimizes surprises and protects finished surfaces during retrofit work.

Each phase includes homeowner touchpoints and clear timelines so you know when equipment decisions affect design or budget. Retrofit projects get a careful compatibility review to avoid unnecessary demolition while meeting performance goals. With process covered, the next subsection shows how outdoor living features are planned around equipment needs.

How do custom outdoor living features complement Paramount and Pentair technologies?

We design outdoor kitchens, fire features, integrated lighting, and landscaping in tandem with pool systems so electrical loads, control zones, and staging work together. Automation hubs are placed to balance service access with discreet placement, and lighting circuits are wired to sync with Pentair scene presets for unified ambiance. Water features and spillways are engineered to match pump capacities and cleaning flow so they don’t interfere with debris handling. Landscape plans include maintenance access and plant/turf choices that reduce windblown debris, helping in‑floor cleaning and filtration perform well in Arizona conditions.

Planning outdoor living with mechanical systems prevents last‑minute compromises that hurt either performance or appearance. Early coordination lets remodel teams deliver cohesive backyard environments where technology supports the intended experience rather than complicating it. After integration strategies, the next section shares real project outcomes with measurable results.

What Are Real-World Benefits and Case Studies Featuring Paramount and Pentair Equipment?

Real projects show that pairing in‑floor cleaning with variable‑speed pumps and automation delivers tangible gains: less manual cleaning, clearer water, and lower energy use. Conservatively reported outcomes include fewer owner maintenance hours and shorter primary pump runtimes when variable‑speed controls and optimized schedules are applied. These case metrics help set realistic ROI expectations and show where maintenance relief is most likely with Paramount and Pentair systems in a luxury remodel.

Project TypeEquipment UsedMeasured Outcome
Remodel (dust‑prone site)Paramount PV3 + Pentair IntelliFlo3Noticeable drop in weekly skimming; lower filtration runtime
New build (complex geometry)PCC2000 + IntelliCenterCleaner surfaces via automated schedules; consistent water clarity
Luxury backyard overhaulVanish outlets + IntelliChlorReduced visible hardware; more stable sanitizer levels

This summary presents conservative, aggregated results rather than guaranteed returns, but it illustrates the common benefits: less manual work, clearer water, and stronger operational control. The sections that follow describe homeowner outcomes and measurable improvements across projects.

How have high-end Arizona homeowners benefited from these partnerships?

High‑end owners report more time entertaining and less time on pool chores after adding in‑floor cleaning and automation. Invisible cleaning hardware paired with smart controls lets hosts set mood and service modes without constant input, making the backyard easier to use for events and daily life. Manufacturer‑backed systems also reduce uncertainty around maintenance schedules and parts replacement, which helps owners plan long‑term. Together these outcomes position a remodeled pool as both a design statement and a practical asset.

Those lifestyle gains matter in Arizona, where extended outdoor seasons and wind bring frequent debris. Addressing those conditions with coordinated equipment selection gives owners a more consistent ownership experience that supports entertaining and relaxation. With homeowner outcomes covered, the next subsection summarizes measurable energy and maintenance improvements.

What measurable energy savings and maintenance improvements have been achieved?

Typical improvements include reduced pump runtime from variable‑speed optimization and fewer hands‑on cleaning hours when in‑floor systems handle routine debris. Energy savings depend on runtime and local rates, but conservative estimates show meaningful reductions when single‑speed pumps are replaced and schedules are optimized. Maintenance improvements show up as fewer weekly interventions and less wear on portable cleaners and skimmer baskets, lowering accessory replacement frequency. While exact numbers vary by site, the consistent trends—lower energy use, reduced manual maintenance, and steadier chemistry—make supplier‑grade systems compelling for high‑end remodel budgets.

Project monitoring commonly pairs runtime logs with homeowner‑reported maintenance hours to build a realistic baseline for expected gains. Those paired measurements inform ROI conversations during design and help prioritize which systems to include. With outcomes and metrics addressed, the final section explains how Arizona homeowners can start a remodel.

How Can High-End Homeowners in Arizona Start Their Luxury Pool Remodeling Journey?

Begin a luxury pool remodel with clear priorities, an understanding of equipment options, and a staged process that balances design goals with system requirements. Prepare photos, top goals, and a budget range to guide the first conversation, then schedule an on‑site assessment so a provider can evaluate hydraulics and retrofit feasibility. Expect a planning sequence: consultation, conceptual design, equipment selection and estimate, then construction and commissioning—steps that ensure Paramount and Pentair systems are integrated correctly. The checklist below outlines a homeowner‑focused path to get started.

  1. Request an initial consultation: Share photos and your goals to start the discovery process.
  2. Receive a site assessment: Have a pro evaluate hydraulics, finishes, and retrofit options.
  3. Review conceptual design and estimate: Compare equipment choices and operational implications.
  4. Approve schedule and begin construction: Coordinate project management and commissioning.

Following these steps helps homeowners make informed equipment choices and sets clear expectations for timeline and outcomes. The next two sections describe Island Pool and Landscaping’s services and how to request a personalized consult.

What consultation and design services does Island Pool and Landscaping offer?

Island Pool and Landscaping provides consultation, custom pool design, project management, outdoor living design and build, artificial turf installation, and a final walkthrough to confirm satisfaction. These services support Paramount and Pentair integrations by ensuring product selection is written into drawings, construction sequencing preserves mechanical access, and commissioning includes homeowner orientation. Our project management coordinates trades and warranty handoffs so the finished pool operates as intended. Homeowners get the convenience of a single team managing design and technical details.

These services support both new builds and remodels by addressing design, equipment selection, landscape context, and ongoing maintenance expectations during planning. The final section explains how to schedule an initial consult and what to prepare.

How to schedule a personalized consultation for Paramount and Pentair integrated pools?

To schedule a consultation, gather project photos, summarize your goals (maintenance reduction, automation, energy savings, or aesthetic aims), and provide a rough budget range to make the discovery call efficient. Use Island Pool and Landscaping’s website or Google Business Profile to request an appointment and note interest in Paramount and Pentair integrations so the initial visit includes a compatibility check. Expect a follow‑up to arrange an on‑site assessment where we document hydraulics, electrical access, and finish conditions to produce a conceptual design and estimate. This prep accelerates decision points and ensures early equipment choices support both the look and operation you want.

Follow this approach and you’ll move from inspiration to a technically sound plan that leverages Paramount in‑floor cleaning and Pentair automation to create a low‑maintenance, energy‑efficient luxury pool tailored to your lifestyle.

Frequently Asked Questions

What is the typical timeline for a luxury pool remodel?

Timelines vary with complexity, size, and features. Expect initial consultations and design to take a few weeks, while construction generally runs four to twelve weeks for most remodels. Factors like permitting, material lead times, and weather can extend that window. We’ll provide a more accurate schedule once we assess scope and site conditions.

How do I choose the right in-floor cleaning system for my pool?

Choosing the right system depends on pool size, shape, and existing infrastructure. Paramount’s PCC2000 suits large custom shells, while PV3 is often a retrofit choice. Consider debris type, weekly maintenance goals, and how visible you want hardware to be. A professional site assessment will confirm compatibility and recommend the best fit.

What maintenance is required for Pentair's smart pool technologies?

Pentair systems reduce manual tasks, but they still need routine checks: inspect the variable‑speed pump for wear, clean or replace filters, and confirm automation schedules and sensors are operating correctly. Monitor chemistry regularly and service sanitization modules like IntelliChlor per manufacturer guidance. An annual professional tune‑up helps keep everything running efficiently.

Can I retrofit my existing pool with Paramount and Pentair systems?

Yes—many Paramount and Pentair products are retrofit‑friendly. PV3, for example, is designed for many existing shells so you can upgrade without a full rebuild. Feasibility depends on your pool’s current layout and condition; a site inspection will show what’s possible and cost‑effective.

What are the energy-saving benefits of using variable-speed pumps?

Variable‑speed pumps like Pentair’s IntelliFlo3 adjust power to match demand, cutting energy use during low‑flow tasks such as filtration. That can lead to notable reductions in utility bills and quieter operation. Savings depend on runtime and local rates, but upgrades from single‑speed pumps typically deliver measurable improvements.

How do I ensure my luxury pool design remains aesthetically pleasing while incorporating technology?

Plan equipment early and work with designers familiar with discreet integrations. Choose low‑profile options like Vanish outlets and place control hubs and service access where they won’t disrupt the view. Coordinating lighting, water features, and control zones during design keeps the visual result cohesive and beautiful.

What should I prepare for my initial consultation regarding a luxury pool remodel?

Bring photos of your pool and inspiration images, a short list of goals (maintenance, automation, energy, aesthetics), and a budget range. This information helps us provide focused recommendations and speeds up the discovery process so we can propose realistic options and next steps.

Conclusion

Specifying industry leaders like Paramount and Pentair in a luxury remodel gives homeowners reliable, innovative, and efficient systems that improve both performance and appearance. These technologies lower maintenance effort, stabilize water quality, and reduce energy use—making them smart investments for high‑end properties. With the right equipment and an experienced team, you can create a stunning, low‑maintenance oasis that fits your lifestyle. Ready to get started? Schedule a consultation with our team to explore options and next steps.

Integrating Outdoor Entertainment Systems in Your Backyard

Integrating Outdoor Entertainment Systems in Your Backyard

Bring Luxury Outdoor Entertainment to Your Backyard — Designed for Arizona Living

A luxury outdoor entertainment system combines weather-rated audiovisual equipment, landscape‑aware installation, and smart automation to turn your backyard into a space that entertains, relaxes, and enhances daily life. This guide walks through what those systems include, why they matter for today’s homeowners, and how outdoor TV installation, weatherproof speakers, and smart tech work together to create poolside movie nights and multi‑zone audio. Homeowners often want high‑quality sound, bright all‑weather displays, and discreet integration that stands up to Arizona’s sun and dust. We cover design possibilities, the key AV and network components to specify, smart automation scenarios, a step‑by‑step design and install process, why a local design‑build partner helps, and long‑term maintenance and upgrade strategies. By the end you’ll know how to plan outdoor AV integration, what to ask your installer, and how to future‑proof poolside entertainment for years of enjoyment.

How Can You Transform Your Backyard with Luxury Outdoor Entertainment Systems?

Luxury outdoor entertainment transforms a yard by blending rugged AV gear with thoughtful landscape design to create areas for movies, sports, and socializing. These systems pair weatherproof displays and speakers with amplifiers, networked control, and layered lighting scenes to shape moods and define functional zones around pools, patios, and lawns. The payoff is a backyard that functions like an outdoor living room or private theater—boosting lifestyle value and giving you more reasons to use the space year‑round. Knowing how these transformations work helps you prioritize the zones and scenes that matter before choosing equipment or signing off on installation.

Common transformation types we design include:

  • Poolside cinema setups with bright, sun‑readable displays and directional speakers for clear movie sound under the stars.
  • Integrated patio living rooms with covered or retractable screens and multi‑zone audio that extend indoor comfort outside.
  • Distributed audio across pool, dining, and garden areas so music and volume follow activity.
  • Mood‑driven lighting and automation that ties AV, irrigation, and climate controls together for effortless hosting.

These approaches deliver lifestyle benefits and measurable resale value, and they inform the equipment and installer choices that fit local conditions.

H3: What Makes Outdoor Entertainment Essential for Modern Backyards?

Outdoor entertainment matters because homeowners now treat exterior spaces as extensions of their home—for daily use, socializing, and quiet retreats. Outdoor sound and poolside systems deliver background music, cinematic audio, and clear commentary for sports gatherings while solving challenges indoor systems don’t face, like glare, reflections, and exposure to weather. With more time spent outdoors, the right mix of multi‑zone audio, durable displays, and smart lighting supports a wide range of activities throughout the year. Identifying those use cases early helps define viewing distances, speaker coverage, and the brightness and weather ratings your displays need.

Those practical requirements lead to the next step: choosing components that withstand heat, UV, and moisture while preserving the look of your landscape.

H3: How Does Island Pools and Landscaping AZ Create Seamless Outdoor Experiences?

Island Pools and Landscaping AZ works as a design‑build partner that coordinates custom pools, landscapes, and outdoor technology so everything feels intentional and lasts. Our team designs pools and yards with AV integration in mind—selecting durable materials, planning equipment placement, and ensuring access for service. Working with one firm eliminates finger‑pointing between trades, improves placement decisions for screens and speakers, and protects the overall aesthetic. That single‑team approach streamlines installation and supports long‑term reliability by aligning hardscape, enclosures, and service access from the start.

That collaboration sets the stage for choosing hardware that’s specified for Arizona conditions—starting with displays and speakers rated for the desert.

What Are the Key Components of a High-End Outdoor Entertainment System?

A high‑end outdoor entertainment system groups into four core areas: all‑weather displays, weatherproof speakers and buried subwoofers, robust amplification and control electronics, and outdoor‑grade network and power infrastructure. Each element must meet weather and brightness requirements and be mounted so it performs reliably—pay attention to sun‑facing brightness (nits), IP ratings, and display ventilation, plus speaker placement to avoid acoustic dead zones near water. Designing these parts as an integrated whole—outdoor TV installation, sound system layout, and Wi‑Fi/mesh coverage—keeps performance consistent for backyard cinemas and poolside entertainment.

The essential components include:

  1. Outdoor TV or display: A weatherproof, high‑brightness display with UV‑resistant enclosure for direct sun viewing.
  2. Outdoor speakers and subwoofers: Landscape or bollard speakers and buried subwoofers for even coverage with low visual impact.
  3. Amplification, receivers, and control: Weather‑rated amps and smart controllers for scene recall and multi‑zone routing.
  4. Networking and power: Outdoor‑capable mesh nodes, surge protection, and sealed power enclosures for dependable streaming and control.

Below is a concise comparison to help guide product selection before you consult an installer.

ComponentKey AttributeTypical Consideration
Outdoor DisplayBrightness & IP ratingSpecify 1500–2000+ nits for sun‑facing installs; IP65+ enclosures limit dust/moisture and UV exposure
Outdoor SpeakersDispersion & mountingWide dispersion for patios; buried subwoofers add bass without visible cabinets
Amplifier / ReceiverWeatherproofing & channelsRack‑mounted gear with ventilation or dedicated outdoor enclosures for protection
Wi‑Fi / MeshCoverage & latencyPlace mesh nodes near living areas to support streaming and reliable smart‑tech control

Which Weatherproof Outdoor TVs Are Best Suited for Arizona Climates?

In Arizona, choose displays engineered for high ambient brightness, active thermal management, and UV‑resistant housings to avoid sun and heat damage. Ask for specs on nits for daytime visibility, IP ratings to keep out dust and moisture, and whether the unit uses active cooling or passive heat dissipation. Homeowners and installers commonly compare purpose‑built outdoor display lines—ask about warranties for direct‑sun installs and recommended mounting clearances. Picking the right display also dictates speaker placement, shading, and viewing comfort strategies.

That decision then informs the overall layout to optimize sightlines and shade wherever possible.

How Do Integrated Outdoor Speaker Systems Enhance Your Backyard Ambiance?

Integrated outdoor speaker systems shape ambiance by delivering even, balanced sound across defined backyard zones while staying visually discreet. Landscape speakers hide in planting beds, bollard speakers guide sound along paths, and buried subwoofers add bass without visible boxes—so a mixed approach usually works best. Placement takes into account listening positions, reflections from hard surfaces, and neighbor concerns; concealing components in planters or behind features preserves the look. Good audio design ties directly into lighting and automation so music and movie soundtracks complement the scene rather than compete with it.

Those placement and aesthetic choices naturally lead to automation strategies that sync lighting, AV, and irrigation for smooth control.

How Can Smart Backyard Automation Elevate Your Outdoor Living Space?

Smart automation ties lighting scenes, AV control, irrigation, and climate devices together so one command sets mood, comfort, and utility. A single “movie night” action can dim landscape lights, send audio to patio speakers, lower a screen, and turn on heaters—so complex coordination happens automatically. Common integration points include voice assistants, app scene control, and central hubs that manage multi‑zone audio and lighting while respecting network limits. Homeowners get convenience, energy savings through scheduling, improved security with simulated occupancy, and consistent ambiance for entertaining.

Below is a simple mapping of common smart features to homeowner benefits to clarify trade‑offs.

Smart FeatureIntegrated FunctionPrimary Benefit
Smart Lighting ScenesColor, dimming, schedulingEasy ambiance control and reduced energy use
AV Scene ControlMulti‑zone routing, presetsSmooth transitions between activities
Smart IrrigationScheduled watering, weather‑basedWater savings and healthier plants
Climate DevicesHeaters/fans with schedulesComfort that extends your outdoor season

What Smart Home Features Integrate with Outdoor Entertainment Systems?

Features that integrate well include lighting control platforms, multi‑zone AV controllers, voice assistants, smart irrigation controllers, and networked climate devices like patio heaters and fans. Those integrations enable scenes—party mode, for example—where paths light up, a playlist starts, and irrigation pauses during the event, all from one app or voice command. You can choose a central hub for orchestrating scenes, direct cloud integrations for remote access, or local control for lower latency and reliability. Picking a control strategy early avoids vendor lock‑in and keeps future upgrades straightforward.

Choosing integration points also shapes the installation sequence and ensures your network can handle the load.

How Does Smart Landscape Lighting Improve Mood and Security?

Smart landscape lighting improves both mood and safety with dimmable fixtures, adjustable color temperature, motion triggers, and schedules that support activities and deter intruders. Warm, layered lighting creates inviting dining and relaxation areas, while path and step lighting keeps everyone safe after dark. Motion‑activated fixtures add security without wasting energy, and automation can simulate occupancy when you’re away. Selecting durable fixtures and protecting power connections ensures scenes remain consistent and fixtures last longer.

Those lighting decisions feed directly into the design and installation plan that makes scenes come to life.

What Is the Process for Designing and Installing a Custom Outdoor Home Theater?

Designing and installing a custom outdoor theater follows a reliable sequence: initial consultation and visioning, system design and product selection, coordinated installation with trades, then testing and ongoing support. This phased approach makes sure choices—screen size, speaker layout, and network topology—match homeowner expectations and site realities like sightlines, sun paths, and power access. Expect measured site surveys, renderings or mock‑ups, and tight coordination among electrician, landscape contractor, and AV installer to protect aesthetics and function. After commissioning, documented testing and a maintenance plan keep performance predictable and reduce service calls.

The steps below summarize typical workflow and timeline.

  1. Consultation and vision planning: Capture use cases, budget, viewing distances, and long‑term goals.
  2. Design and product selection: Specify displays, speakers, amps, and automation rated for local climate.
  3. Installation and coordination: Sequence trades, install mounts and wiring, and protect gear with enclosures.
  4. Testing, commissioning, and support: Calibrate audio/video, program scenes, and set up maintenance protocols.

How Does Consultation and Vision Planning Ensure Personalized Solutions?

Consultation and vision planning make solutions personal by documenting lifestyle needs, preferred activities, budget parameters, and site constraints before choosing gear. Installers gather details like typical audience size, primary viewing spots, audio coverage goals, nearby reflective surfaces, and available power/network access. That checklist‑driven process aligns product performance—brightness, speaker dispersion, and mountings—with practical realities like sun orientation and wiring routes. A thorough vision phase reduces rework and results in placements and products that satisfy over the long term.

A detailed plan then moves smoothly into installation and testing where those decisions are realized.

What Are the Steps for Professional Installation and Ongoing Support?

Professional installation follows staged milestones: site prep and conduit rough‑in, mounting and wiring of displays and speakers, enclosure and weatherproofing work, then detailed audio/video calibration and scene programming. Roles typically include a design‑build lead coordinating landscapers and electricians, an AV installer handling integration, and a commissioning tech validating performance. At handoff, homeowners receive documentation on settings, firmware update steps, and seasonal checks. Service agreements or maintenance plans that cover firmware updates, warranty coordination, and annual inspections help preserve uptime and protect the investment.

Clear responsibilities and proactive support reduce downtime and make future upgrades simpler.

Why Choose Island Pools and Landscaping AZ for Your Outdoor Entertainment Integration?

Island Pools and Landscaping AZ brings full design‑build experience to integrated outdoor projects—combining custom pools and landscapes with AV integration and a focus on quality, detail, and customer care. Working with a single firm that understands hardscape, softscape, and AV placement reduces coordination friction, simplifies warranty handling, and ensures equipment is installed for peak performance and easy service access. Our portfolio of luxury backyard projects emphasizes cohesive aesthetics and durable installations that address Arizona‑specific issues like heat, dust, and sun exposure. Homeowners get a partner who designs the landscape and integrates the technology rather than tacking AV on as an afterthought.

When evaluating partners, ask about their design‑build coordination, examples of integrated work, and how they handle long‑term service and homeowner communication.

How Does Local Arizona Expertise Benefit Your Outdoor System?

Local Arizona expertise helps by matching materials and installation methods to desert conditions—specifying UV‑resistant enclosures, advising on shading or ventilation for sun‑exposed displays, and scheduling maintenance around dust and heat seasons. Knowing local sun paths and temperature swings guides optimal display orientation and mount heights to reduce glare and thermal stress. Local experience also yields practical service interval recommendations and protective measures that extend component life in arid environments. This climate‑aware approach improves performance and lowers the risk of premature failure.

Those local choices also affect which premium brands and warranties are most valuable for long‑term support.

What Luxury Brand Partnerships Enhance System Quality and Reliability?

Luxury brand partnerships matter because top outdoor display, speaker, and control manufacturers generally offer higher IP ratings, outdoor‑specific warranties, and proven field performance—key to long‑term reliability. Expect reputable outdoor AV names to come up during product discussions; these vendors invest in rugged materials and support networks for outdoor deployments. Ask about outdoor warranty terms and the installer’s experience with each brand. Choosing well‑supported manufacturers simplifies spare parts sourcing and service over the system’s life.

Knowing which brands do well outdoors helps homeowners prioritize durability and serviceability over the lowest upfront price.

How Do You Maintain and Upgrade Your Outdoor Entertainment System Over Time?

Maintaining and upgrading an outdoor system follows a scheduled, proactive approach: routine cleaning, firmware updates, seasonal inspections, and planned upgrades to network and control elements as tech changes. Regular tasks keep performance steady—cleaning displays, checking speaker fastenings, testing surge protection, and updating the control hub. Typical upgrade paths start with network improvements, then control hub or software updates, and finally component replacements like displays or speakers; this order minimizes disruption while extending system life. A proactive maintenance plan also catches weathering early and supports smarter long‑term investments, such as adding zones or modern smart devices.

Below is a practical maintenance schedule to guide homeowners through routine care.

ComponentMaintenance TaskFrequency / Notes
Outdoor DisplayClean enclosure, check seals, test brightnessQuarterly cleaning; inspect seals biannually before summer
Speakers & SubwooferVisual inspection, cable tension, calibration checkBiannual checks and annual audio calibration
Network & PowerFirmware updates, mesh optimization, surge protection testUpdate firmware quarterly; test surge devices annually
Enclosures & MountsCheck for corrosion, ventilation clearanceInspect annually and before monsoon season

What Are Best Practices for Weatherproofing and Durability?

Weatherproofing best practices include using IP‑rated enclosures, elevating and ventilating displays to prevent heat buildup, running sealed conduit for cabling, and installing surge protection for electrical storms. Choose hardware with proven UV resistance and stainless‑steel fasteners or protective coatings to minimize corrosion in dusty conditions. Seasonal prep—verifying seals before the hottest months and cleaning dust after storms—reduces stress on components and prevents premature wear. Doing this work at installation simplifies upkeep and lowers lifecycle costs.

These protective measures also create a solid foundation for future upgrades without replacing the entire system.How Can You Incorporate Emerging Smart Technologies into Existing Setups?

Bringing new smart tech into an existing system works best as a phased plan: strengthen the network backbone first, add a flexible control hub next, then introduce new devices and voice integrations to avoid compatibility problems. Upgrades often start with mesh Wi‑Fi improvements to cut latency and extend coverage, then move to a control platform that supports modern APIs and voice assistants. Run compatibility checks and pilot new devices in a small zone before full rollout. Keeping wiring modular and enclosures accessible makes hardware swaps easier. This sequence modernizes your setup while protecting investments in current displays and speakers.

That upgrade path lets you modernize steadily while keeping the yard usable for events and everyday life.

Frequently Asked Questions

What are the benefits of integrating smart technology into outdoor entertainment systems?

Smart technology makes outdoor systems easier to use and more capable. From a single app or voice command you can control lights, audio, and climate to create tailored experiences—like a “movie night” that dims lights, adjusts sound, and lowers a screen automatically. Smart schedules reduce energy use, and motion‑activated lighting adds security. In short, smart integration delivers convenience, efficiency, and a polished experience for hosting and everyday living.

How do I choose the right outdoor entertainment system for my space?

Start by evaluating how you’ll use the space, its size, and your typical guest count. Consider sightlines, sun exposure, and how permanent you want the installation to be. Choose weatherproof AV components rated for your climate and think about smart integration for easy control. A professional site assessment and consultation will produce tailored recommendations that balance performance, aesthetics, and budget.

What maintenance is required for outdoor entertainment systems?

Regular maintenance keeps systems reliable: clean displays and enclosures, check seals and cable connections, test audio, and install firmware updates for smart devices. Schedule seasonal inspections to catch wear from dust, heat, or storms. A simple maintenance routine prevents bigger problems and helps the system last longer.

Can I upgrade my existing outdoor entertainment system?

Yes. Begin with a system audit to identify weak points—often the network or control hub—and plan upgrades in phases. You can add smarter control, improve Wi‑Fi, or swap in newer displays and speakers. Work with a pro to ensure compatibility and to stage changes without disrupting the whole system.

What are the common challenges faced when installing outdoor entertainment systems?

Challenges include glare and heat on screens, sound reflections from hard surfaces, weatherproofing requirements, and coordinating electricians, landscapers, and AV techs. Planning, good site surveys, and working with experienced design‑build teams mitigate these issues and keep the project on schedule.

How do I ensure my outdoor entertainment system is energy efficient?

Use smart scheduling and automation so devices run only when needed, choose LED lighting and energy‑efficient audio gear, and consider solar lighting where appropriate. Regular firmware updates and system tuning also help maintain efficient operation over time.

Conclusion

A thoughtfully integrated luxury outdoor entertainment system turns your backyard into a versatile place for gatherings and relaxation while boosting lifestyle and property value. Understanding the right components and design choices lets you create a dependable, beautiful AV experience tailored to your needs. Partnering with a knowledgeable design‑build team ensures the result is both functional and visually cohesive—built to withstand Arizona conditions. Reach out to learn how our team can transform your outdoor living space.

Popular Pool Shapes & Layouts for Arizona Backyards

Popular Pool Shapes & Layouts for Arizona Backyards

Popular Pool Shapes & Layouts for Arizona Backyards: Luxury Looks, Practical Solutions

Arizona homeowners choosing a pool must balance aesthetics, yard geometry, and the realities of a desert climate. This guide explains how common pool types — from freeform lagoon-style basins to precise geometric lap pools and compact spools — behave here and what they mean for maintenance, outdoor living integration, and long-term efficiency. You’ll learn which shapes work best on small urban lots versus resort-style estates, how features like Baja shelves and infinity edges change function and feel, and which energy- and water-saving choices matter under intense sun. We walk through six planning areas: popular luxury shapes and their strengths, L-shaped pool benefits, Phoenix-focused layouts for different lot sizes, luxury feature trade-offs, climate-forward material and equipment guidance, and a practical project checklist that ends with how to book a custom consultation. Local search terms like freeform pool Arizona, l-shaped pool, and energy-efficient pool designs Arizona are woven in where they help connect ideas to your neighborhood conditions.

What Are the Most Popular Luxury Pool Shapes in Arizona?

Luxury pool shapes in Arizona span organic freeform lagoons to clean-lined geometric pools — each delivers different lifestyle benefits and maintenance needs. Freeform pools favor curves, rockwork, and waterfalls for a resort vibe; geometric pools emphasize lanes, straight sightlines, and a modern aesthetic. L-shaped pools separate play and lap zones and often fit corner lots efficiently, while plunge pools and spools pack performance into tight footprints. Knowing these differences makes it easier to match form to function, construction complexity, and ongoing upkeep in a desert setting. Below is a concise comparison to help match pool shape to your property goals.

Different pool shapes bring distinct practical strengths and visual roles. The table below helps you compare them quickly for Arizona yards.

Pool ShapeCharacteristicBest-for / Value
Freeform lagoon-style poolsCurved edges, rockwork, waterfallsResort look, blends with desert planting
Geometric / rectangular poolsStraight edges, lap lanes, modern finishesExercise, contemporary homes, low debris
L-shaped poolsZoned shallow/play plus deeper lap or spa armFamily use, entertaining, corner-lot efficiency
Plunge poolsCompact footprint, deep swim depthSmall yards, quick cooling, low upkeep
Spool (spa-pool)Hybrid spa and pool, heated optionsCompact luxury, year‑round social seating

This quick comparison clarifies which shapes align with common lifestyle goals and lot constraints. Next, we explain why freeform designs remain a top luxury choice in Arizona.

Why Choose Freeform Pool Designs for Arizona Backyards?

Freeform pools use organic geometry and natural hardscape to create a private, resort-like retreat that sits comfortably in desert landscapes. Irregular edges, integrated boulders, and planted buffers soften scale and can conceal equipment behind the hardscape. The result is a highly customizable yard feature — waterfalls, boulder steps, and extended tanning ledges — that fits irregular or sloped lots where a rectangle would feel forced. Freeform layouts also give you flexibility for decking, outdoor kitchens, and shade structures. After discussing this adaptability, many homeowners consider when a geometric approach better supports modern architecture.

How Do Geometric Pool Ideas Complement Modern Arizona Architecture?

Geometric pools — rectangular lap basins, cantilevered vanishing edges, and compact spools — pair naturally with contemporary homes by reinforcing symmetry and clean material palettes. Materials like dark plaster and linear tile produce reflective planes that visually expand patios and support crisp sightlines. Geometric forms also simplify maintenance zones, equipment access, and the integration of lanes, lighting, and covers — all helpful under Arizona’s sun. Architects often align pool geometry with terraces and indoor views, so a precise shape can preserve architectural coherence while supporting exercise and clean modern aesthetics. With that in mind, many homeowners then look at the flexible, multi-use benefits of L-shaped layouts.

How Do L-Shaped Pools Benefit Arizona Homeowners?

L-shaped pools create natural activity zones: a shallow wing for play and lounging and a deeper arm for laps or a spa. That division supports supervision from patios and living rooms, and the elbow space often becomes the ideal spot for an outdoor kitchen or dining terrace. Corner placements maximize deck and landscape area on tight lots and allow integrated seating, planters, and shade structures to wrap the pool naturally. Functionally, the shape also makes it easier to separate mechanical systems — useful for spa heating or pump zoning — which matters in a climate where energy efficiency is a priority. The sections that follow list design advantages and show how to tie L-shaped pools into outdoor living.

L-shaped pools deliver several direct design advantages for Arizona yards.

  1. Zoned Functionality: Separate shallow and deep areas prevent activity conflicts and support multiple uses.
  2. Space Efficiency: Corner placement preserves usable deck and landscape on tight lots.
  3. Seamless Integration: The shape creates natural locations for outdoor kitchens, fire features, and seating.

These benefits make the L-shape a practical middle ground between compact plunge pools and sprawling resort layouts. The next section digs deeper into those design advantages.

What Are the Design Advantages of L-Shaped Pools in Arizona?

L-shaped pools offer controlled circulation, clear user zones, and easier integration with pergolas, pool bars, and other built elements. One leg can house tanning ledges and family zones while the straight arm remains dedicated to laps or deeper play, reducing interference between users. From a build standpoint, the rectangular legs simplify excavation and staging on constrained sites while still delivering architectural interest. The final effect is a balanced composition that supports lively family days and relaxed evenings — a versatile option across Phoenix and Scottsdale properties. Next we show practical ways to integrate these pools with outdoor living.

How Can L-Shaped Pools Integrate with Outdoor Living Spaces?

L-shaped pools work well when patios and outdoor kitchens wrap around one or both legs, creating smooth circulation and unobstructed sightlines from interior rooms. Designers often align deck heights and use continuous materials — travertine, low-profile pavers, or textured concrete — to blur the transition between waterline and living areas. Built-in seating, submerged benches, and narrow planters along the pool leg create small entertaining zones without expanding the footprint. Orientation to the sun guides placement of shade structures to combat afternoon heat and affects material selection to minimize glare and surface temperature. With those integration strategies in mind, homeowners often want layout suggestions tailored to Phoenix yards of different sizes.

Which Custom Backyard Pool Layouts Work Best in Phoenix?

Choosing a layout in Phoenix starts with lot size, sun and prevailing wind orientation, and how you want to use the space — exercise, entertaining, or low-maintenance cooling. Small urban lots benefit from plunge pools, spools, and narrow lap designs that deliver big impact without sacrificing outdoor living. Mid-size family yards commonly use L-shaped or elongated freeform plans that balance play and laps. Large, resort-style estates layer zones — tanning ledges, vanishing edges, extensive hardscape — to create a cohesive entertainment campus. Good site planning includes sun-path analysis, wind-pattern awareness for outdoor dining comfort, and view corridors to maximize Arizona vistas. The sections below break down small-yard options and elements of resort-style layouts to help you decide.

Compact Phoenix yards can still achieve a luxury feel with focused, multi-functional layouts that prioritize efficiency and atmosphere.

Design ChoiceTypical Yard SizePractical Benefit
Plunge poolUnder 400 sq ftCooling and relaxation with a minimal footprint
Spool (spa-pool)200–600 sq ftHeated seating and pool function in one compact feature
Narrow lap pool1000+ sq ftFitness-focused swim lane that preserves deck space

This compact comparison helps you visualize options that preserve entertaining areas. The next subsection outlines ideal small-yard layouts in practical terms.

What Are Ideal Pool Layouts for Small Arizona Backyards?

Small-backyard layouts work best when each element serves multiple purposes — spa seating, a shallow tanning ledge, and vertical water features add luxury without a large footprint. A spool gives you seating and heat for year-round use; a narrow lap or corner L-shape provides exercise and cooling without crowding the deck. Designers consolidate equipment into compact enclosures and specify low-debris plantings to reduce maintenance. Thoughtful lighting and layered hardscapes create perceived depth and make small yards feel more expansive and inviting. These compact strategies translate directly to planning larger, resort-style layouts when you need to scale up.

How to Design Resort-Style Pool Layouts for Luxury Arizona Homes?

Resort-style layouts layer features — tanning ledges, seating niches, vanishing edges, and defined outdoor rooms — to support both intimate gatherings and large events. Clear circulation routes keep guests moving between patios, kitchens, and pool edges without crossing swim lanes; framed sightlines from indoor rooms highlight key features. Using consistent materials across decks, coping, and outdoor kitchens preserves an elevated look day or night, while multi-level lighting and fire features extend usable hours. Staggered depths create micro-environments for kids, casual loungers, and serious swimmers, improving safety and functionality. With features selected, homeowners should weigh which upgrades add meaningful value versus unnecessary cost or upkeep.

What Luxury Features Enhance Arizona Pool Designs?

Features like Baja shelves, infinity edges, integrated spas, advanced automation, and LED lighting change how pools are used and felt in Arizona. Each feature brings aesthetic appeal and operational trade-offs: Baja shelves expand shallow lounging, infinity edges maximize views on slopes, integrated spas enable year‑round comfort, and automation simplifies routine maintenance while improving efficiency. Choose features with local climate in mind — high solar load, evaporation, and mineral content all influence material and equipment choices. The table below compares common luxury features by benefit and typical Arizona considerations to help prioritize upgrades.

The table below compares popular luxury features with practical considerations to help homeowners prioritize upgrades.

FeatureAttribute / BenefitTypical Cost Range / Consideration
Baja shelf (tanning ledge)Shallow lounging area, great for familiesModerate cost; increases exposed surface and evaporation
Infinity edge (vanishing edge)Dramatic, seamless view integrationHigher cost; needs catch basin and additional pumping capacity
Integrated spaHeated seating and jets for year-round useAdds heating equipment and seasonal energy use
Smart pool automationRemote control and scheduling for pumps, heaters, lightsReduces manual work; improves pump efficiency
Water features (waterfalls, scuppers)Visual and auditory appealVariable cost; adds plumbing and maintenance needs

This comparison highlights the trade-offs between look and long-term operational cost, and it leads into how Baja shelves and infinity edges affect placement and performance.

When evaluating features, Island Pool & Landscaping brings local experience that turns design intent into buildable solutions while being upfront about maintenance and performance impacts.

We design, build, and landscape custom pools and outdoor living spaces across Arizona. Our team focuses on attention to detail, clear communication, and lasting customer satisfaction. Our primary service is CustomPool Design and Build, with strengths in luxury pool remodeling and complete outdoor living projects. We back our work with a transparent process and proven results to help homeowners feel confident booking a consultation.

That positioning should reassure homeowners as they weigh which luxury elements belong in their yard.

How Do Baja Shelves and Infinity Edges Elevate Pool Aesthetics?

Baja shelves add a shallow, sun-warmed living area that invites social lounging and easy access for kids — a transitional zone between deck and water. They let you float chairs and umbrellas partially submerged for cooling relief under Arizona sun. Infinity edges create a sweeping, vanishing effect where water meets view, best used on sloped lots or properties with a strong panorama. Both features require careful placement: wind can increase evaporation on Baja shelves and scatter skimmed water from infinity edges, so orientation and equipment planning are important for long-term performance. With placement decided, smart technologies can help optimize how these features operate.

What Smart Pool Technologies Are Popular in Arizona Luxury Pools?

Popular smart technologies include automation platforms, variable-speed pumps, solar controllers, automated covers, and remote monitoring systems. Automation schedules filtration, heating, and lighting for off-peak hours to save energy while keeping water balanced; variable-speed pumps cut energy use by matching flow to the task rather than running full speed. Remote monitoring alerts you to chemistry or equipment faults, reducing emergency service calls. These systems pair well with features like infinity edges and integrated spas because automated sequences can manage fill levels, temperature, and run cycles without constant manual intervention. After choosing technology, designers factor Arizona’s climate into orientation, shading, and material choices.

How Does Arizona’s Climate Influence Pool Shape and Layout Choices?

Arizona’s hot, dry climate drives design decisions that limit evaporation, reduce solar heat gain, and minimize debris, while maximizing comfort and cutting operating costs. Sun orientation and shading determine where lounges and dining areas are most usable in summer. Material choices — light-reflective coping and heat-resistant decking — lower surface temperatures underfoot. Equipment selections like variable-speed pumps, efficient heaters, and covers reduce energy use and water loss. Plant palettes of drought-tolerant species reduce maintenance. The table below links common design choices with climate considerations and homeowner recommendations so you can trade off comfort, cost, and aesthetics thoughtfully.

The table below connects climate-driven design choices with clear recommendations for Arizona properties.

Design ChoiceClimate ConsiderationPractical Recommendation
Shade structures and pergolasReduces occupant heat stressPosition shade for afternoon sun; use breathable fabrics
Light-colored coping and deckingLowers surface temperatureChoose travertine or textured concrete to limit heat retention
Variable-speed pumps and automationReduces energy use and runtimeSchedule filtration for early morning or night
Pool covers and reduced surface area featuresLimits evaporationUse automated covers and avoid excessive exposed surface

This mapping helps prioritize improvements that reduce operating costs and improve summer usability. Next we cover landscaping that complements desert poolscapes.

What Landscaping Ideas Complement Pool Designs in Desert Environments?

Drought-tolerant planting reduces water use and debris while framing the pool with agaves, succulents, and Mediterranean shrubs. Warm stone, textured pavers, and earth-toned palette choices make pools feel tied to the landscape and reduce glare. Place plants to limit leaf drop near water and choose root profiles that won’t threaten pool shells or plumbing; locate larger shade trees at a distance to provide cooling without extra maintenance. Layered planting, stucco or rammed-earth planters, and gravel mulch add texture while keeping upkeep low. With planting sorted, focus next on energy-efficient equipment to handle Arizona heat.

How Do Energy-Efficient Pool Designs Address Arizona’s Heat?

Energy-efficient designs in Arizona focus on cutting pump runtimes, limiting evaporation, and using solar where it makes sense. Variable-speed pumps with smart controllers tailor flow rates to the task and reduce energy use versus single-speed units. Automated covers curb evaporation and overnight heat loss, lowering water and chemical costs. Solar heating can deliver comfortable swim temps without heavy gas use, and deliberate shade and orientation reduce daytime heat demand. These equipment and layout choices lead into the practical steps homeowners need when planning a build or remodel.

How to Plan and Customize Your Arizona Backyard Pool Project?

Successful planning starts with a thorough site assessment, a realistic budget, and a timeline that factors in permits, construction sequencing, and landscaping. Early tasks include measuring site constraints, mapping sun paths and prevailing winds, and collecting images that express style and priority features. Budgets vary by shape and finish — infinity edges and major rockwork increase cost and schedule — so prioritize must-haves versus nice-to-haves during design. Choose a designer-builder who explains process, shows proven workflows, and outlines warranties and service expectations to minimize surprises. The checklist below prepares you for a smoother consultation and build.

  1. Site Assessment: Measure the lot, note access points and utilities, and record slopes and sun orientation.
  2. Budgeting & Prioritization: Define must-haves and set contingency funds for upgrades.
  3. Design & Permitting: Finalize schematic design, secure permits, and coordinate HOA reviews as needed.
  4. Construction Phases: Demolition/excavation, plumbing/electrical, shell and finishes, pool start-up and commissioning.
  5. Landscaping & Lighting: Install plantings, hardscape, and layered lighting for evening use.

This checklist outlines the typical sequence of activities to expect. The final section explains what to bring to a consultation with a local design-build team.

What Design Considerations Should Arizona Homeowners Know?

Consider site logistics — construction access, slopes, and existing utilities — alongside your goals: lap swimming, entertaining, or low maintenance. Equipment access clearances, setback rules for fencing, and proximity to utility lines can affect shape choice and add excavation or retaining costs. Match pool scale to house architecture to keep the yard proportional; material choices affect durability and daytime comfort. Bring inspiration photos, preferred materials, and a realistic timeline to your first meeting — clear direction speeds schematic design and yields more accurate budgets. Preparing these items sets you up for a productive consultation with a design-build specialist.

How to Schedule a Custom Pool Design Consultation with Island Pool & Landscaping?

Prepare site photos, a short description of lifestyle goals, and a prioritized feature list before your initial consultation — these items help focus the conversation and produce a useful preliminary budget. Island Pool & Landscaping designs, builds, and landscapes custom pools and outdoor living spaces across Arizona, with a focus on detail, transparent communication, and customer satisfaction. Expect the consultation to cover site constraints, preferred shapes (freeform, geometric, L-shaped, plunge, spool), and a phased proposal with deliverables and timelines. To request a consultation, use our contact details on the site and bring sample images to accelerate concept development.

Taking this step turns planning into action, helping you make informed decisions about shape, layout, and luxury features for your Arizona backyard.

Frequently Asked Questions

What factors should I consider when choosing a pool shape for my Arizona backyard?

Think about yard size and layout, how you’ll use the pool (entertaining, exercise, cooling), and the local climate. Small yards benefit from compact designs like plunge pools or spools, while larger properties can support freeform or geometric layouts. Also consider how the pool will connect to outdoor living areas, sun exposure, and upkeep expectations — these impact both function and look.

How can I enhance the energy efficiency of my Arizona pool?

Install a variable-speed pump and smart automation to run filtration and features during off-peak hours. Use automated covers to cut evaporation and heat loss, and consider solar heating to maintain comfortable temperatures without heavy gas use. Light-colored decking and coping reduce surface heat, improving comfort and lowering cooling demand.

What are the best landscaping options to complement my pool design?

Choose drought-tolerant plants like succulents, agaves, and Mediterranean shrubs to reduce water use and debris. Use warm stone and textured pavers to tie the pool into the landscape. Place shade trees strategically to provide cooling without excessive leaf drop near the water.

How do I ensure my pool design is suitable for family use?

Include zoning features like an L-shape or a Baja shelf to separate play areas from deeper swim zones. Add safety features such as automated covers, non-slip surfaces, and clear sightlines from indoor living areas. Built-in seating and shallow lounging areas make the pool more inclusive for all ages.

What are the advantages of using smart pool technology in Arizona?

Smart tech improves convenience and cuts operating costs. Automation schedules pumps, heaters, and lights for efficiency; variable-speed pumps reduce power draw; and remote monitoring alerts you to chemistry or equipment issues before they become emergencies. These tools make maintenance easier and more predictable in Arizona’s climate.

How can I effectively plan my pool project from start to finish?

Begin with a site assessment and a realistic budget. Work with a designer to finalize shape and layout, secure permits, and plan a construction timeline. Prioritize features, understand how they affect cost and schedule, and choose a builder who explains process and warranties clearly for a smoother project.

Conclusion

Picking the right pool shape and layout for your Arizona backyard elevates outdoor living while balancing function and maintenance. Whether you favor freeform curves, geometric precision, or the flexible L-shape, choose features and materials that suit your lifestyle and local climate. Ready to move forward? Contact Island Pool & Landscaping to schedule a custom consultation and start the design process for your dream pool.

Island Pool & Landscaping: Our Design-Build Process

Island Pool & Landscaping: Our Design-Build Process

Island Pool & Landscaping — How Our Luxury Design‑Build Process Creates Your Custom Outdoor Retreat

Bringing design and construction together under one team reduces back-and-forth, protects your budget, and speeds decisions. Below we walk through how our unified design‑build process turns your ideas into a finished resort‑style backyard: clear project phases, technical checks, iterative 3D design, disciplined construction, and a careful handover. You’ll learn what to expect from the first meeting to warranty, how renderings and material specs limit surprises, typical construction milestones, and the aftercare steps that keep systems running well. This guide focuses on choices that matter in Arizona—water-wise plantings, durable finishes, and realistic timelines—so you can compare providers and plan with confidence.

This integrated approach is a reliable way to simplify complex projects and improve client outcomes.

Design‑Build: One Team, One Responsibility

Design‑Build (D‑B) combines design and construction under a single contract with one legal entity—the design‑builder. That single point of responsibility reduces coordination gaps and supports stronger project performance.

Communication issues in design-build project delivery method, 2015

We wrote this page to help discerning homeowners understand our process and feel secure choosing a design‑build partner. The goal is practical clarity—explain the steps, timelines, and service commitments that earn trust during a luxury pool and landscape project.

Our Four Phases: How a Luxury Pool Project Moves from Idea to Finished Backyard

We organize projects into sequential phases so decisions are made early, risk is reduced, and responsibility stays clear. Pairing creative design with construction planning keeps budgets realistic and timelines predictable. Below are the core phases we use on luxury pool and integrated landscape projects, with the primary objective of each and the homeowner benefit.

Island Pool and Landscaping uses a four‑phase framework that centralizes communication and makes every decision traceable—helping avoid surprises and manage permits and site constraints during construction.

  1. Vision & Discovery: Clarify goals, how you’ll use the space, budget range, and lifestyle priorities to define scope and a preliminary budget.
  2. Concept & Design: Create conceptual plans and 3D visuals that test layouts, materials, and sightlines so the scope is refined before pricing.
  3. Construction & Implementation: Carry out site work, pool structure, systems, and hardscape/softscape installs with milestone quality checks.
  4. Completion & Handover: Perform final walkthroughs, train homeowners on systems, deliver documentation, and transition warranty coverage.

These phases lead into the initial consultation, where we capture priorities and confirm feasibility before design work begins.

Initial Consultation: How We Learn What Matters to You

The first meeting sets expectations. We ask focused discovery questions about pool use, entertaining, maintenance tolerance, preferred styles, and your budget range so concepts align with real needs. We’ll photograph the site and note measurements or schedule a survey if needed. After the consultation you’ll get a short scope summary, a ballpark budget range, and a proposed timeline—so the next design steps and feasibility checks are clear.

Capturing lifestyle details early ensures the concept reflects how you’ll actually use the space, and it leads directly into technical site analysis.

Site Analysis & Feasibility: What We Check Early

On site we evaluate topography, drainage, utilities, access, and permitting constraints to confirm the concept is buildable and to identify what accommodations may be required. Technical checks include slope and grading reviews, utility locating, setback considerations, and preliminary drainage strategies—each one shaping design choices and cost. In Arizona we pay special attention to water use and plant palette choices so the design favors drought‑tolerant materials and native species. If a site raises concerns, we document practical options—revised grading, retaining walls, or simplified features—and show how those choices affect budget and schedule.

A thorough feasibility check minimizes change orders during construction and prepares the permit and documentation work that follows.

Concept Design & Material Selection: Balancing Look, Durability, and Cost

Conceptual design turns discovery and feasibility findings into visual options, then refines those options through review and 3D renderings until we land on a preferred scheme. Early visuals and material studies help you compare pool finishes, decking, paver layouts, and planting palettes so you can weigh aesthetics against maintenance and long‑term cost. During this phase we also prepare permit‑ready documents and detailed material specs so estimates are accurate. Prioritizing finishes and plants suited to Arizona’s climate—low‑water planting and resilient surfacing—speeds approvals and improves long‑term performance.

Clear design visuals and specifications reduce surprises on site and feed directly into permitting and construction documents.

We use high‑fidelity 3D renderings and virtual walkthroughs to align expectations and accelerate decisions.

3D Renderings & Virtual Walkthroughs: Why They Matter

3D renderings turn plans into photoreal images and walkthroughs that show materials, lighting, and spatial relationships so you can judge sightlines and scale. These tools let you see how pool shapes, deck widths, and planting masses read from key viewpoints and test alternatives before construction starts. By exposing conflicts early—visibility from indoor spaces or shade impact—renderings shorten decision cycles, reduce on‑site changes, and help lock down budgets. They also provide a clear visual reference for permitting reviewers and subcontractors.

Architectural research shows these visual tools improve client understanding and collaboration.

3D Rendering for Architectural Design & Visualization

As 3D models become central to collaborative architectural work, this study explores how rendering and VR impact user experience and coordination in design visualization.

3D Rendering Impact in Virtual Reality based Architectural Design Collaboration, 2024

Because renderings clarify intent, they directly lower construction risk and guide material specification decisions summarized next.

Choosing Finishes and Decking: Practical Options for Arizona

Material choices determine durability, maintenance, and long‑term appearance. Comparing options helps you pick finishes that match your lifestyle and climate. Common choices include pool finishes, decking materials, paving systems, and plant palettes suited to Arizona’s arid environment. Key criteria are sun resistance, slip performance, maintenance frequency, and visual character. The table below compares representative finish and decking options to help set realistic cost and upkeep expectations.

Introductory summary: Use this table to compare durability, maintenance considerations, and typical cost ranges for common finishes and decking systems.

Finish / Decking OptionDurabilityAesthetic / MaintenanceTypical Cost Range
Pebble/aggregate pool finishHighNatural texture; occasional acid wash recommendedMid–High
Quartz-based pool finishHighSmooth appearance; resists staining; moderate upkeepMid–High
Porcelain pavers (decking)Very highLow maintenance; uniform look; cooler underfootHigh
Stamped concrete (decking)MediumHighly customizable; periodic resealing advisedLow–Mid
Native xeric planting paletteHighLow water needs; seasonal interest; minimal irrigationLow–Mid

Higher‑quality materials usually mean lower lifetime maintenance and more consistent aesthetics; choosing finishes that match your use and upkeep tolerance prevents regret down the road.

Construction & Implementation: How We Build Your Resort‑Style Backyard

Construction turns approved designs into reality through coordinated site prep, pool structure, mechanical systems, and landscape finishes—while following a schedule and quality checks. Work typically starts with permitting and mobilization, moves through excavation and structural shell work, and finishes with decking, equipment installation, and planting. We manage site logistics—dust control, staging, and neighbor access—to keep the job safe and minimize disruption. Clear milestone expectations and documented QA at each stage help you track progress and reduce uncertainty about timing or scope changes.

Below is a concise timeline mapping major construction phases to typical durations so you can plan around site activity and milestone reviews.

Construction PhaseKey TaskTypical Timeline / Duration
Permitting & mobilizationSecure permits and prepare site2–8 weeks
Excavation & structural workDigging, steel, and shotcrete/gunite shell1–3 weeks
Plumbing & electrical rough-inInstall pipework and conduits before finishes1–2 weeks
Finishes & deckingPool finish, pavers, decks, and coping2–4 weeks
Landscaping & commissioningPlanting, irrigation, system startup1–3 weeks

Knowing typical timelines helps you plan milestone meetings and personal access; the next section explains how project management and client communication support those checkpoints.

Project Management & Communication: Keeping Your Project on Track

Strong project management centralizes schedule control, subcontractor coordination, and client communication so the build stays on track and transparent. Your dedicated project manager delivers weekly progress summaries, milestone alerts, and acts as the single escalation point for decisions. Communication usually includes an agreed response SLA, regular photo or video updates, and scheduled on‑site walkthroughs at critical stages. A steady cadence—weekly updates plus milestone meetings—keeps you informed without slowing construction.

Clear communication reduces friction and supports the quality assurance checks described next.

  1. Dedicated Project Manager: One point of accountability to coordinate teams and report status.
  2. Weekly Progress Updates: Short summaries that document completed tasks and next steps.
  3. Milestone Walkthroughs: Onsite reviews at key stages for client sign‑off.

These practices preserve decision transparency and help prevent scope creep during construction.

Key Milestones & Quality Checks

Milestones are inspection points where we verify quality and obtain approvals before proceeding—this prevents rework and hidden defects. Typical checks include pre‑pour verification of steel and embeds, rough‑in confirmation for plumbing and electrical, structural shell integrity tests, leak and pressure testing, and final finish inspections for tile, coping, and decking. At each checkpoint we create a documented punch list with assigned resolution timelines; third‑party testing or municipal inspections are scheduled as required. Proactive QA—site supervision, photos, and formal sign‑offs—reduces disputes and ensures systems work as designed.

The checklist below summarizes primary checks and who usually performs them so you know what to expect for verification and correction times.

  1. Pre-Pour Inspection: Verify steel, forms, and embedments before concrete or shotcrete placement.
  2. Rough-In Verification: Confirm plumbing and electrical routing and slopes before covering.
  3. Leak and Pressure Tests: Test circulation and pressure lines to confirm system integrity.
  4. Finish Inspection: Review tile, coping, decking, and equipment installation for workmanship.
  5. Final Systems Commissioning: Demonstrate automation, filtration, heaters, and controls to the owner.

These milestones connect directly to the final walkthrough and handover, where documentation and training are provided.

Completion, Handover & Aftercare: Our Close‑Out Process

Completion and handover formalize acceptance of the finished project and give you the tools to operate and maintain systems confidently. The final walkthrough produces a punch list for remaining items, and we deliver manuals, warranty paperwork, and in‑person system demonstrations so you know how to run pumps, automation, and irrigation. The handover package typically includes maintenance recommendations, seasonal care checklists, and clear instructions for service or warranty requests. Transparent warranty terms and optional aftercare plans provide ongoing support after we leave the site.

In short: final walkthrough, documentation delivery, equipment training, and warranty handover are the core elements of a successful completion.

Final Walkthrough & Handover: What to Expect

The final walkthrough follows a structured agenda: confirm punch‑list items, demonstrate pool systems and controls, and hand over manuals and as‑built notes. Your project manager will show you pool automation settings, filtration basics, irrigation schedules, and the recommended first 30 days of operation—while recording any remaining punch‑list items and completion targets. Deliverables include the completed punch list, equipment manuals, a maintenance schedule, and warranty documentation so you know who to contact for future service. This handover transfers practical knowledge and sets expectations for post‑handover care.

After the walkthrough you’ll have the documentation and training needed for confident, safe operation and for filing any warranty claims if necessary.

Warranty & Aftercare: Ongoing Protection and Support

Warranty and aftercare describe the post‑construction protections that keep structural and mechanical investments performing as intended. Typical categories include structural warranties, manufacturer equipment warranties, and workmanship remedies; many clients also enroll in ongoing maintenance plans for cleaning, chemical balancing, and seasonal startup/shutdown services. The table below outlines common service types, coverage scope, and typical durations so you know what to expect after handover and how to request service.

Introductory note: The following table summarizes typical warranty and aftercare offerings, their scope, and expected durations.

ServiceCoverage / ScopeTypical Duration
Structural WarrantyProtection for pool shell integrity and major structural defects10 years (typical industry benchmark)
Equipment WarrantyManufacturer coverage for pumps, heaters, and control systems1–5 years depending on the component
Workmanship & FinishRemedy period for installation defects and finish issues1–2 years
Aftercare Maintenance PlanRoutine cleaning, chemistry management, and seasonal servicesOngoing (subscription-based)

Clear warranty terms and a simple service request process reduce owner worry and protect the value of your investment.

  • Service Request Process: Clear steps to log issues and expected response windows.
  • Regular Maintenance: Early scheduled service to stabilize water chemistry and system performance.
  • Warranty Documentation: All manufacturer and contractor paperwork provided at handover.

These aftercare steps set homeowners up for long‑term success and lead into why clients select our firm.

Why Island Pool & Landscaping: Local Expertise, Single‑Team Accountability

We specialize in design‑build luxury pools and complete outdoor living spaces—resort‑style pools, integrated hardscapes, thoughtful planting, and artificial turf where appropriate. Our designers focus on refined compositions that balance beauty and function. We back our work with responsive communication (24‑hour reply window Monday–Saturday), a satisfaction‑guaranteed final walkthrough, and custom, no‑obligation plans. Local Arizona plant knowledge is built into every design so landscapes are drought‑conscious and resilient. Those commitments help guide clients from concept through long‑term care.

What our service commitments mean for you:

  • Creative designers who compose resort‑style layouts that work for real life.
  • Proactive communication and defined response SLAs to keep schedules moving.
  • Satisfaction‑guaranteed walkthroughs and customized, no‑obligation plans to protect your interests.

If you want a single‑team accountability model paired with local landscape insight and disciplined communication, our process is designed to protect your investment and deliver a beautiful, lasting outdoor space.

Our Promise: Clear Communication, Careful Quality, Confident Ownership

We commit to transparent communication, rigorous quality assurance, and a handover that leaves you comfortable operating every system. That includes detailed documentation, scheduled milestone sign‑offs, and a final walkthrough covering maintenance and operation—steps that reduce surprises after handover. Our 24‑hour reply window (Mon–Sat) keeps small issues from becoming big problems and reflects our practical service ethic. Together with creative design and local planting expertise, these standards help clients feel confident during construction and throughout ownership.

These service standards naturally lead into simple steps to start your transformation.

Ready to Start? How to Prepare for Your Consultation

Begin by gathering recent yard photos, listing priority features, and setting a loose budget range so the design team can recommend realistic options. Expect discovery questions about lifestyle, entertaining, irrigation tolerance, and maintenance preference. After the meeting we’ll outline next steps, feasibility checks, and a proposed timeline. Bringing reference images, site constraints, and any HOA rules speeds concept development and permitting. The initial consultation is a no‑pressure way to build trust and shape a clear plan.

A short checklist to bring to your consultation:

  • Recent photos of the yard and key house elevations.
  • A list of must‑have features and nice‑to‑have items.
  • An estimated budget range and timeline preferences.

Being prepared makes the discovery phase faster and more productive so your project moves smoothly into design and permitting.

Frequently Asked Questions

What should I consider when choosing a design-build firm for my outdoor project?

Look for experience with luxury outdoor spaces, a portfolio you admire, and local references. Verify their track record with drought‑tolerant landscaping if you’re in Arizona. Pay attention to communication habits—how they handle updates and response times—and ask about warranty and aftercare so you know what support looks like after handover.

How can I prepare for the initial consultation with the design team?

Gather recent yard photos and house elevations, list must‑haves and nice‑to‑haves, and set a rough budget and preferred timeline. Bring reference images and any HOA guidelines. These materials help the team give realistic options and keep the first meeting focused and productive.

What are the benefits of using 3D renderings in the design process?

3D renderings show materials, scale, and sightlines in a realistic way so you can choose finishes and layouts with confidence. They reveal potential conflicts early, shorten decision time, and give contractors and permitting authorities a clear visual target—reducing costly changes during construction.

How do you handle changes or modifications during the construction phase?

We document any requested change, review its cost and schedule impact with you, and issue a formal change order for approval. Your project manager will explain implications before work proceeds so decisions are transparent and the schedule stays on track where possible.

What types of aftercare services do you offer post-construction?

We offer warranty support for structural and equipment items plus optional maintenance plans for cleaning, chemical balancing, and seasonal startup/shutdown. We also provide a clear process to request service so issues are handled promptly and professionally.

How do you ensure quality during the construction process?

Quality is managed through defined milestones and inspections—pre‑pour checks, rough‑in verification, leak and pressure tests, and finish inspections—overseen by your project manager. We document inspections and corrective actions so there’s a clear record of quality control throughout the build.

What is the typical timeline for completing a luxury pool and landscaping project?

Timelines vary with scope and site complexity. From initial consultation to final handover a project can take several weeks to a few months. Major phases—permitting, excavation, structural work, and finishes—each have their own typical durations. Understanding those ranges helps you plan and stay informed about progress.

Conclusion

Choosing a design‑build approach gives you a single team accountable for design and construction, which reduces miscommunication and protects your investment. With clear phases, disciplined project management, and a focus on climate‑appropriate materials, you can move from concept to a beautiful, functional outdoor living space with confidence. When you’re ready, schedule an initial consultation and we’ll help you begin the transformation.

Luxury outdoor living space in Arizona featuring a pool, decorative planters, and a blend of hardscape and softscape elements, designed for desert climate aesthetics and functionality.

Achieving Balance: Hardscape & Softscape in Design

Luxury outdoor living space in Arizona featuring a pool, landscaped gardens with vibrant flowers, and comfortable seating areas amidst a blend of hardscape and softscape elements.

Essential Arizona Pool Cleaning Tips: Island Pools and Landscaping AZ

Great outdoor design in Arizona comes down to balance: the right mix of built elements and living landscape creates an estate that looks finished, works for everyday life, and performs well in a desert climate. This guide walks homeowners through what hardscape and softscape are, why their proportions matter for beauty and value, and how designers marry function with water-wise practices. You’ll get practical ratio guidelines for different lifestyles, clear strategies for integrating pools and water features, and the core principles—proportion, transition, color, and texture—that turn yards into cohesive outdoor rooms. We also share plant and material suggestions suited to Arizona and examples of how Island Pools and Landscaping AZ applies these ideas on design-build projects. By the end you’ll have concrete steps to plan a durable, drought-aware landscape where patios, pavers, planting beds, and pools all work together for entertaining, relaxation, and long-term value.

Thoughtful, sustainable landscape design strengthens the appeal and market value of luxury homes.

Design Principles for Sustainable Luxury Landscape Architecture

This study examines which architectural and landscape choices shape luxury homes, using case studies to identify key design elements. The authors break luxury design into seven components—security, spatial volume, materials, façade, interiors, courtyards, and landscape—and highlight how sustainable approaches increase both environmental performance and property value. The research underscores that integrating sustainability into landscape design is central to long-term luxury home planning.

The effective landscape design parameters with high reflective hardscapes: guidelines for optimizing human thermal comfort in outdoor spaces by design-a case on …, RA Abdelwahab, 2025

What Are Hardscape and Softscape Elements in Landscape Design?

Hardscape is the nonliving, constructed framework of a yard—patios, walkways, retaining walls, pool decks—that defines circulation, outdoor rooms, and durable surfaces for entertaining. Softscape is the living layer—trees, shrubs, grasses, planting beds, and mulches—that brings shade, seasonal color, habitat, and a softer edge to built elements. Distinguishing these categories helps homeowners and designers decide where to allocate space, which materials to specify, and how to plan irrigation and maintenance for a balanced, high-end Arizona landscape. Below are concise definitions and everyday examples to help you recognize what to change when planning your property.

Hardscape examples:

  • Patios and terraces laid in natural stone or permeable pavers that define outdoor rooms and circulation.
  • Pathways, steps, retaining walls, and pool coping that control elevation and provide durable surfaces.
  • Outdoor kitchens, fire features, and driveways that anchor social areas and serve specific functions.

Softscape examples:

  • Shade trees and structural shrubs that add vertical form and reduce heat near living areas.
  • Drought-tolerant flowering plants, ornamental grasses, and groundcovers chosen for seasonal interest and low water use.
  • Planting beds, mulch, and artificial turf options that keep a living layer while limiting upkeep.

Which Features Define Hardscape in Luxury Outdoor Spaces?

Elegant outdoor space featuring a premium hardscape design with a natural stone patio, outdoor kitchen with grill, and a cozy fire pit surrounded by comfortable seating and vibrant landscaping.

Luxury hardscape blends high-quality materials with precise detailing to make outdoor spaces feel like natural extensions of the house. Expect natural stone terraces, precision pavers, integrated kitchens, custom fire elements, sculpted retaining walls, and premium pool decks with specialized coping. Material choices—travertine, limestone, textured porcelain, or broom-finished concrete—affect surface temperature, slip resistance, and upkeep. Choosing finishes that harmonize with the home’s exterior and the planting palette keeps circulation logical and supports entertaining. Smart hardscape design also plans for drainage, grading, and future updates.

What Living Components Constitute Softscape in Arizona Landscapes?

Vibrant Arizona garden featuring drought-tolerant palo verde trees, ornamental grasses, and colorful flowering plants, emphasizing custom landscaping solutions for luxury outdoor living.

In Arizona, softscape emphasizes drought-tolerant, native, and low-litter species that give structure, color, and habitat while using water sparingly. Trees like palo verde and mesquite provide shade and cooling; shrubs such as sage and brittlebush add texture and seasonal blooms; succulents and ornamental grasses lower water needs while contributing form. Plant selection should reflect sun exposure, microclimates, and maintenance preferences—grouping plants by water needs improves irrigation efficiency and plant longevity. Well-designed softscape also enhances soil health and creates more comfortable microclimates around pools and patios.

Why Is Balancing Hardscape and Softscape Essential for Landscape Harmony?

A thoughtful balance between hardscape and softscape produces a yard that looks unified, works well, and stands up to Arizona’s climate. The right mix turns a backyard into usable outdoor living, boosts curb appeal, and protects your investment. Good balance helps define zones for entertaining and play, reduces heat through shade and permeable surfaces, and improves drainage. By contrast, too much paving feels sterile, while too much unmanaged planting can be high-maintenance. Below are three practical benefits to help evaluate your existing landscape and plan improvements.

Balancing hardscape and softscape delivers:

  1. Visual cohesion: A considered mix of materials and plants creates rhythm, contrast, and a refined sense of place.
  2. Usability: Durable surfaces support dining and circulation while plantings define rooms and provide comfort.
  3. Value & sustainability: Proper proportions lower maintenance needs and improve water efficiency, protecting long-term value.

These benefits point to the design choices that follow—proportion guidelines and plant palettes that align use, durability, and desert-smart practices.

How Does Balance Enhance Aesthetic Appeal and Visual Harmony?

Visual harmony comes from managing visual weight, repetition, and texture so hardscape anchors the composition and softscape weaves around it to guide the eye. Repeating paving materials, echoing plant colors, or aligning a path with an architectural axis creates a deliberate, elegant look. Contrast between smooth paving and layered planting beds adds sophistication while keeping outdoor rooms legible. Designers use these moves to create focal points and sightlines so the landscape complements the home instead of competing with it.

In What Ways Does Balance Improve Functionality and Outdoor Living Use?

A balanced plan clearly defines zones for entertaining, dining, relaxing, and play so each activity has the right surface, shade, and adjacent planting buffers. Hardscape carries load-bearing needs—kitchens, furniture, pathways—while softscape moderates temperature, reduces glare, and soaks up stormwater. Coordinating irrigation, grading, and permeable materials prevents standing water and protects plant health near structures. These practical gains make your backyard more enjoyable and reduce ongoing maintenance headaches.

What Are the Ideal Hardscape to Softscape Ratio Guidelines for High-End Arizona Homes?

A good starting point for luxury Arizona properties is roughly 50–60% hardscape and 40–50% softscape, then adjust for lifestyle, site conditions, and water budgets. Entertaining-focused yards often lean toward 60% hardscape; xeriscape-minded designs may swing to 60–70% softscape with little or no turf. Ratios shift with slope, existing trees, HOA rules, and desired outdoor programs—treat them as flexible guidelines. Contemporary practice favors more permeable hardscape and clustered planting beds to boost infiltration and shade. The table below helps match ratio ranges to common homeowner priorities and maintenance levels.

Yard TypeRecommended Hardscape : SoftscapeTypical Materials / Maintenance Notes
Entertainment-focused60 : 40Generous patio with pavers and outdoor kitchen; moderate irrigation for surrounding plantings
Low-water / xeriscape40 : 60Gravel paths and clustered natives; minimal turf, low irrigation, seasonal pruning
Family-friendly50 : 50Durable pavers, optional artificial turf, shaded play areas; medium maintenance and safety surfaces

This simple comparison shows how lifestyle drives the ratio and material decisions homeowners make to balance function and sustainability.

Tailoring these ratios to local preferences and Arizona’s desert conditions produces more practical, attractive results.

Arizona Residential Landscape Preferences & Desert Design

Research in the Phoenix metro area examined homeowner preferences and common practices, finding that neighborhoods with CC&Rs tended to have fewer trees, more shrubs and groundcovers, and less turf. More homeowners described their front yards as “desert” rather than “oasis” or “mesic,” especially where covenants are strict, though many homeowners still prefer oasis-style yards when given the choice. The study highlights how local rules and preferences shape residential landscape choices in the desert Southwest.

Residential landscaping in Phoenix, Arizona, US: Practices and preferences relative to covenants, codes, and restrictions, 2003

Once ratio goals are set, many homeowners choose a design-build partner to translate percentages into construction-ready plans and timelines. Island Pools and Landscaping AZ specializes in luxury outdoor living projects that balance these ratios with on-site realities; we provide portfolio examples and a consultative process to align hardscape and softscape with your priorities. For personalized guidance to adapt these ratios to your Arizona property, call Island Pools and Landscaping AZ at 602.818.1277 or email PoolConnect@Gmail.com to schedule a design consultation and review project examples.

How Do Luxury Homeowners Customize Ratios for Personal Outdoor Living Styles?

Customization starts by mapping how you want to use the space—entertaining, quiet relaxation, family play—and sizing hard and soft areas to support those activities. For a resort-style poolscape, homeowners typically expand hardscape around the pool for loungers and decks and cluster lush plantings for privacy and softness. Garden-focused owners may reduce paving to showcase specimen trees and xeric plantings, emphasizing irrigation efficiency and habitat. Material choices—heated porcelain for entertaining terraces, permeable pavers for casual paths—support each style and affect maintenance and cost.

Which Factors Influence Ratio Decisions in Desert Climate Landscapes?

Arizona’s climate creates both constraints and opportunities: limited water favors drought-tolerant species and efficient irrigation; intense sun calls for canopy trees or shade structures to cool hard surfaces. Microclimates formed by walls, slopes, or existing trees influence plant selection and hardscape placement for comfort and water savings. Local regulations, HOA rules, pool setbacks, and drainage requirements can also shift ratios. A site checklist—sun angles, existing trees, soil type, and drainage—helps adapt baseline ratios to your specific property.

Research shows hardscape and softscape choices directly affect outdoor thermal comfort, reinforcing the need for climate-adaptive design.

Optimizing Hardscape & Softscape for Outdoor Thermal Comfort

The study finds that landscape patterns can significantly influence mean radiant temperature (MRT) by managing solar absorption and reflection. Smaller, scattered hardscape layouts, together with a mix of light and dark surfaces, wood, and vegetated areas, reduce reflected solar energy. The authors recommend balanced hardscape/softscape layouts, integrated vegetation and water features, and the use of lighter materials in dispersed patterns to improve outdoor thermal comfort and sustainability.

The effective landscape design parameters with high reflective hardscapes: guidelines for optimizing human thermal comfort in outdoor spaces by design-a case on …, RA Abdelwahab, 2025

How Can You Integrate Pools and Water Features with Balanced Hardscape and Softscape?

Good pool integration coordinates scale, edges, and planting so the pool reads as part of the overall composition instead of an isolated element. Aim to match pool coping and nearby terraces, use layered planting to screen equipment, and create transition zones that move from wet edges to drier plant palettes. Maintenance realities—chemical drift, leaf litter, and slip resistance—should guide plant selections and surface finishes. Below is a straightforward sequence to harmonize pools with the surrounding landscape.

Steps to integrate pools and planting:

  1. Choose edge treatments and coping that visually connect pool decks with patio materials and the home’s architecture.
  2. Create transition planting zones with low-litter, drought-tolerant species that tolerate occasional splash and pool chemicals.
  3. Arrange sightlines and focal points so the pool becomes an integrated part of the garden composition rather than an endpoint.

These steps inform material and planting choices and help set realistic maintenance expectations. Island Pools and Landscaping AZ brings experience in pool remodels and full outdoor living projects, applying these integration steps during design and construction to deliver cohesive, long-lasting results.

Pool Edge TreatmentMaintenanceBest Plant Types
Natural stone copingModerate sealing; higher thermal massAgave, yucca, ornamental grasses (low litter)
Concrete / porcelain paversLow maintenance; choose slip-resistant finishesMediterranean salvias, tidy low-mess shrubs
Raised beam / retaining copingRequires structural upkeepColumnar trees with high canopies and sparse underplanting

What Design Principles Ensure Harmony Between Pools and Surrounding Elements?

Harmony depends on scale, continuous materials, and managed sightlines so the pool relates at human scale to the house and garden. Matching colors and textures across coping, terraces, and pathways creates a unified visual language. Use small berms, layered shrubs, and vertical accents to create privacy without blocking views. Orient seating and paths to capture the best sightlines and solar exposure. These moves keep circulation clear, enhance focal points, and keep the yard functional and welcoming.

Which Materials and Plants Complement Pool Areas in Arizona Outdoor Living?

Near pools, pick low-litter, salt- and chemical-tolerant plants and cool, non-slip paving to reduce maintenance and improve comfort. Good paving choices include textured natural stone or matte porcelain pavers to limit glare and surface heat; permeable joints help infiltration and reduce runoff. Plant picks that perform well include drought-adapted salvias, agaves placed away from decking edges, and columnar trees that provide canopy with minimal leaf drop. Avoid high-mess or fruiting trees near pools to keep filters and decking cleaner.

What Principles Guide Harmonious Hardscape and Softscape Integration?

Four guiding principles—proportion, scale, transition zones, and color/texture—form the design grammar that pulls disparate elements into a cohesive outdoor environment. Apply these by sizing patios for real activities, choosing plant and wall heights that echo the home, and using texture and color to create continuity and contrast. Smooth transitions—soft edging, gentle grades, and layered planting—prevent abrupt changes and improve circulation and visual flow. The table below connects each principle to practical application and the expected visual result.

PrinciplePractical ApplicationExpected Visual Effect
ProportionSize patios for group seating and clear circulation pathsComfortable, human-scaled spaces
ScaleMatch plant and wall heights to the architectureBalanced vertical relationships
Transition ZonesCreate gradual changes from deck to planting bedsSmoother flow and softer edges

Consistently applying these principles results in an outdoor composition that reads intentional and relaxed—more usable and more enduring.

How Do Proportion, Scale, and Transition Zones Create Visual Flow?

Proportion and scale make elements feel appropriate for human use and the house’s size—a too-small patio next to a large interior will feel off, while a well-sized terrace reads purposeful. Transition zones—gravel strips, planting borders, or narrow paths—soften abrupt edges and let the eye move naturally through space. Layered planting from low groundcovers to mid shrubs and taller trees adds depth, frames focal points, and improves microclimates. Together these techniques invite movement and support multiple activities.

Why Are Color, Texture, and Focal Points Vital for Outdoor Design Balance?

Color and texture link hardscape and softscape by repeating tones and tactile qualities across materials and plants, creating unity with room for contrast. Warm stones paired with silvery foliage or textured pavers next to fine grasses makes for refined contrast that reads well from inside and out. Focal points—a sculptural tree, a fire element, or a reflective water surface—anchor views and organize circulation. When placed with intent, focal elements guide movement and provide restful moments that lift the whole design.

How Does Island Pools and Landscaping AZ Craft Balanced Outdoor Living Spaces?

Island Pools and Landscaping AZ is a design-build firm focused on luxury outdoor living that blends pools, hardscape, and softscape with creative design and careful execution. We act as both an information resource and a hands-on partner for homeowners seeking bespoke solutions in Arizona. Our consultative process balances aesthetic goals with sustainability and function, and we emphasize clear communication, thorough walkthroughs, and responsiveness during design and construction to earn trust and deliver high-quality results. The sections below outline our process and the sustainable plant and material choices we favor to show how we turn balance into built projects.

What Is Our Proven Process for Achieving Hardscape and Softscape Harmony?

We begin with an on-site assessment and design briefing to document priorities, constraints, and lifestyle needs, then move through iterative design development and material selection aligned with the agreed ratio approach. During construction we sequence grading, drainage, irrigation, hardscape installation, and planting to protect plant material and minimize rework. Quality control checks and mid-build walkthroughs ensure details—material transitions, edge conditions, and drainage—are executed correctly. Finally, we complete a client walkthrough, review maintenance expectations, and hand over documentation to support long-term landscape care.

How Do We Incorporate Drought-Tolerant Plants and Sustainable Materials?

We specify drought-tolerant, native, and low-litter plants to reduce irrigation needs while keeping visual interest through seasonal blooms and textural contrast. Sustainable material choices include permeable pavers, recycled aggregate base materials, and locally sourced stone when appropriate to lower embodied transport impact and improve on-site infiltration. Grouping plants by water need and using efficient irrigation controls further conserves water while sustaining plant health in Arizona’s climate. These choices deliver resilient outdoor living spaces that preserve a luxury look with a smaller environmental footprint.

  1. Planning: Detailed site survey and client briefing to set program and ratio targets.
  2. Design: Scaled plans with material palettes, planting lists, and phased construction scheduling.
  3. Build: Coordinated construction focused on drainage, soil prep, and finish details.
  4. Closeout: Final walkthrough, maintenance guidance, and project handover.

To discuss a design consultation, call Island Pools and Landscaping AZ at 602.818.1277 or email PoolConnect@Gmail.com to request project information and portfolio examples.

Frequently Asked Questions

What are the benefits of using drought-tolerant plants in Arizona landscapes?

Drought-tolerant plants are a smart choice in Arizona’s climate because they use significantly less water, lowering utility costs and environmental impact. They usually need less pruning and general upkeep, which cuts maintenance time and expense. Thoughtful selections also add year-round texture and color—so you can have an attractive, resilient landscape that thrives in the desert.

How can homeowners ensure proper irrigation for their hardscape and softscape?

Start by grouping plants with similar water needs and using efficient systems like drip irrigation and smart controllers that adjust to weather. Regularly check soil moisture rather than relying on a schedule alone. Choosing permeable hardscape materials where practical also helps water infiltrate instead of running off. Together these steps prevent over- and under-watering and keep both plantings and paved areas performing well.

What role do color and texture play in outdoor living design?

Color and texture bring unity and interest to a yard. Repeating a stone tone in planting accents or pairing warm paving with cool foliage creates an intentional palette. Textural contrast—smooth pavers beside coarse grasses—adds depth and helps define areas visually. These choices make outdoor rooms more inviting and readable from both inside the home and out.

How can homeowners create zones for different outdoor activities?

Identify the primary uses—dining, lounging, play—and size and place surfaces to suit each activity. Use patios, pathways, and low walls to define zones, and add planting beds or trees for natural separation and privacy. Consider shade, sun exposure, and access points so each zone is comfortable and easy to use.

What maintenance practices are recommended for balanced landscapes?

Set a routine for watering, pruning, and seasonal checks, prioritizing drought-tolerant species to minimize irrigation. Inspect hardscape regularly for issues like cracks or settling and address drainage problems early. Mulch planting beds to retain moisture and suppress weeds. Periodic seasonal reviews will help you fine-tune plant selections and irrigation as the landscape matures.

How can homeowners enhance the aesthetic appeal of their outdoor spaces?

Use focal points—art, water features, or signature plants—to anchor views and guide movement. Stick to a cohesive color palette across materials and plantings, and layer plants of varying heights and textures for depth. Night lighting highlights key features and extends usability after dark, adding warmth and atmosphere.

Conclusion

Balancing hardscape and softscape is the foundation of luxurious, usable outdoor living in Arizona. When proportions, materials, and plant choices reflect your lifestyle and the climate, you get a durable, beautiful landscape that performs year after year. If you’d like help translating these ideas into a customized plan, reach out to a design-build team that understands both luxury design and desert smart practices. Explore our services to transform your Arizona property into a refined, drought-aware oasis.